AMI Builder Pipeline
Deploy AMI Builder Pipeline
In this section, we will proceed to build an AMI Pipeline via EC2 Image Builder.
EC2 Image Builder is a service that simplifies the creation, maintenance, validation, and distribution of Linux/Windows Images.
- It can be used for EC2 AMIs, container images on Amazon ECR, as well as VM images for on-premises environments.
- Reduces time and effort spent on repetitive tasks.
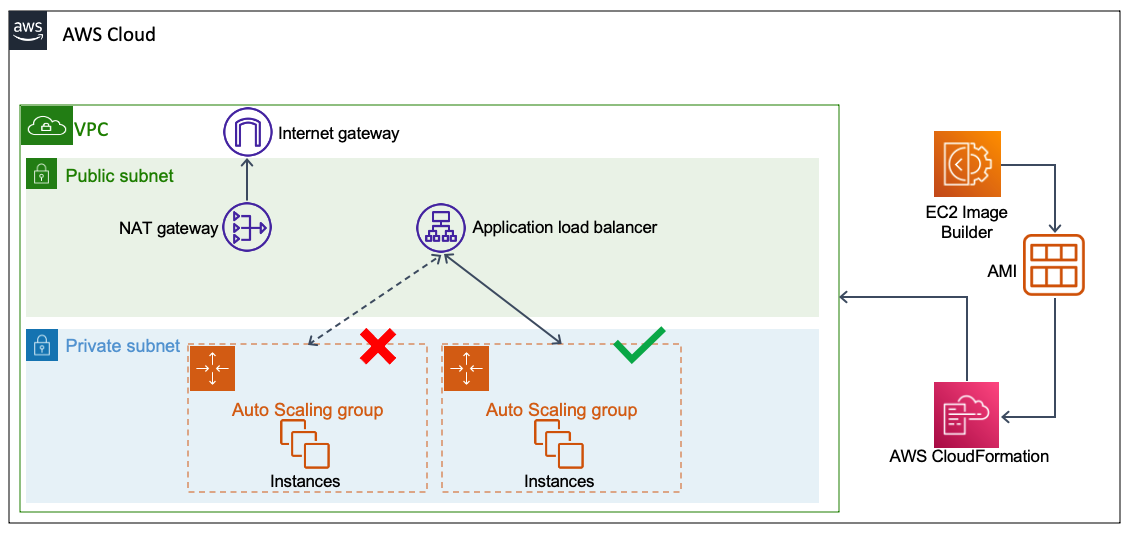
Upon completing this section, we will be able to:
- Build an AMI Pipeline ourselves.
- Automatically create new AMIs containing the latest patches.
- Be ready to replace the old AMIs and deploy them to the current application environment.
CloudFormation Stack
To proceed with infrastructure deployment, we will use the AWS CloudFormation service via the AWS Console or AWS CLI.
| Component | Value (Required) |
|---|---|
| Stack Name | pattern3-pipeline |
| Template | pattern3-pipeline.yml - download in the Template section below |
| BaselineVpcStack | pattern3-base |
Please download the template here:
The template takes the following parameters:
| Parameter | Default | Meaning |
|---|---|---|
BaselineVpcStack | (required) | Stack name of the Base Infrastructure section, used to fetch VPC and Private Subnet |
MasterAMI | /aws/service/ami-amazon-linux-latest/al2023-ami-kernel-default-x86_64 | SSM Public Parameter pointing to the latest Amazon Linux 2023 AMI |
Ver | 1.0.0 | Version of the Component and Image Recipe |
BuildInstanceType | t3.medium | Instance type used for building the AMI |
EnableInspectorScanning | false | Enable vulnerability scanning with Amazon Inspector for the output AMI |
AWS CLI
Here are the initialization steps via AWS CLI:
- Create CloudFormation Stack.
aws cloudformation create-stack --stack-name pattern3-pipeline --template-body file://pattern3-pipeline.yml --parameters ParameterKey=BaselineVpcStack,ParameterValue=pattern3-base --capabilities CAPABILITY_IAM --region ap-southeast-2

Wait for the Stack to complete creation. This step is fairly quick, taking about 1 to 2 minutes, as we are just creating the definition of the pipeline and not building the AMI yet.
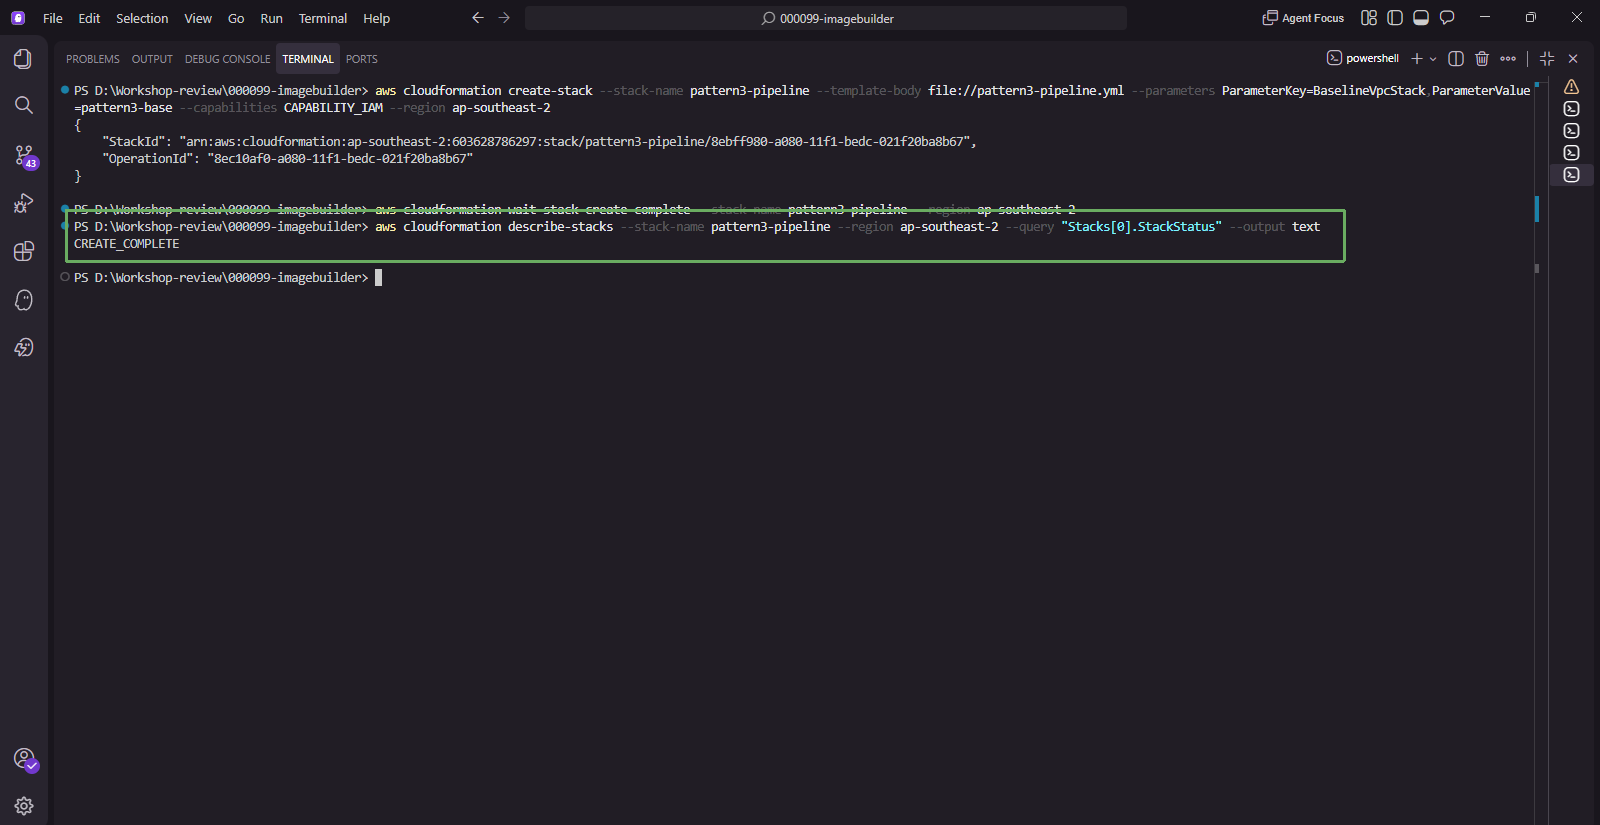
aws cloudformation wait stack-create-complete --stack-name pattern3-pipeline --region ap-southeast-2Verify that the CloudFormation Stack has been successfully created with the StackStatus as
CREATE_COMPLETE.aws cloudformation describe-stacks --stack-name pattern3-pipeline --region ap-southeast-2 --query "Stacks[0].StackStatus" --output text
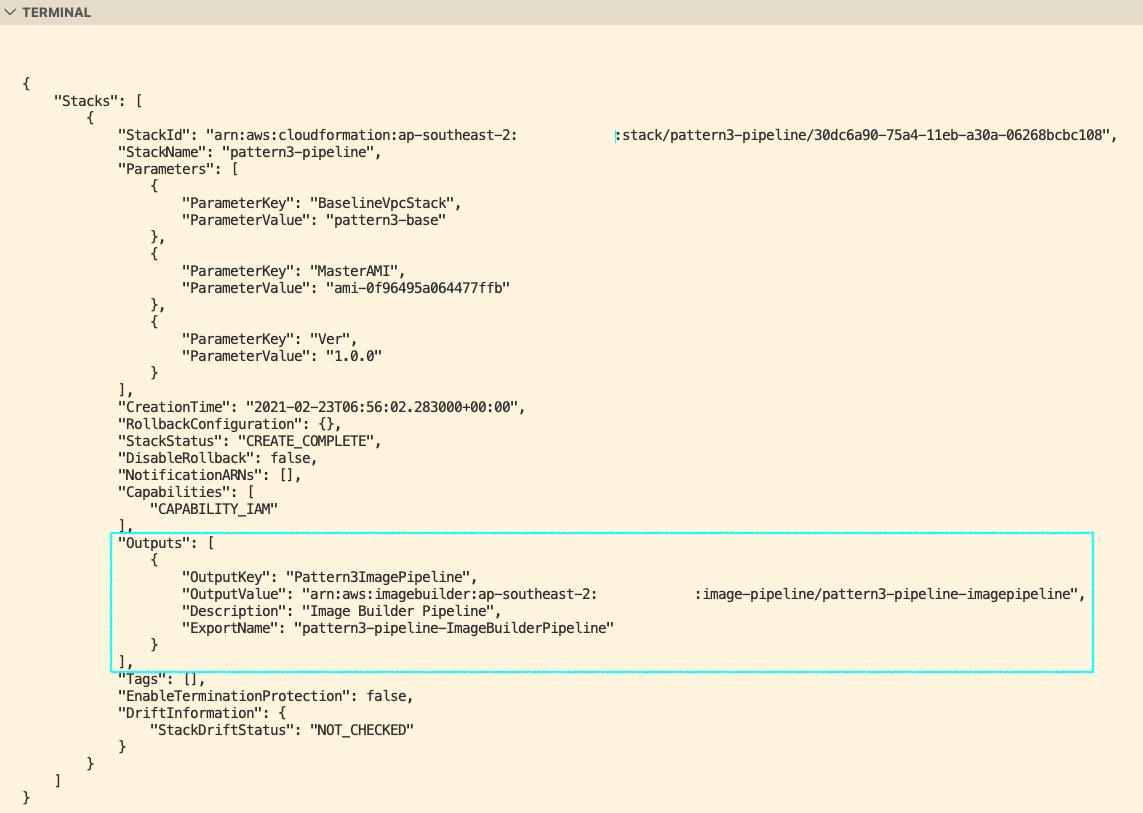
- Note down the values in Outputs, especially
Pattern3ImagePipeline(the pipeline ARN) andPattern3ParentImageId.aws cloudformation describe-stacks --stack-name pattern3-pipeline --region ap-southeast-2 --query "Stacks[0].Outputs" --output table
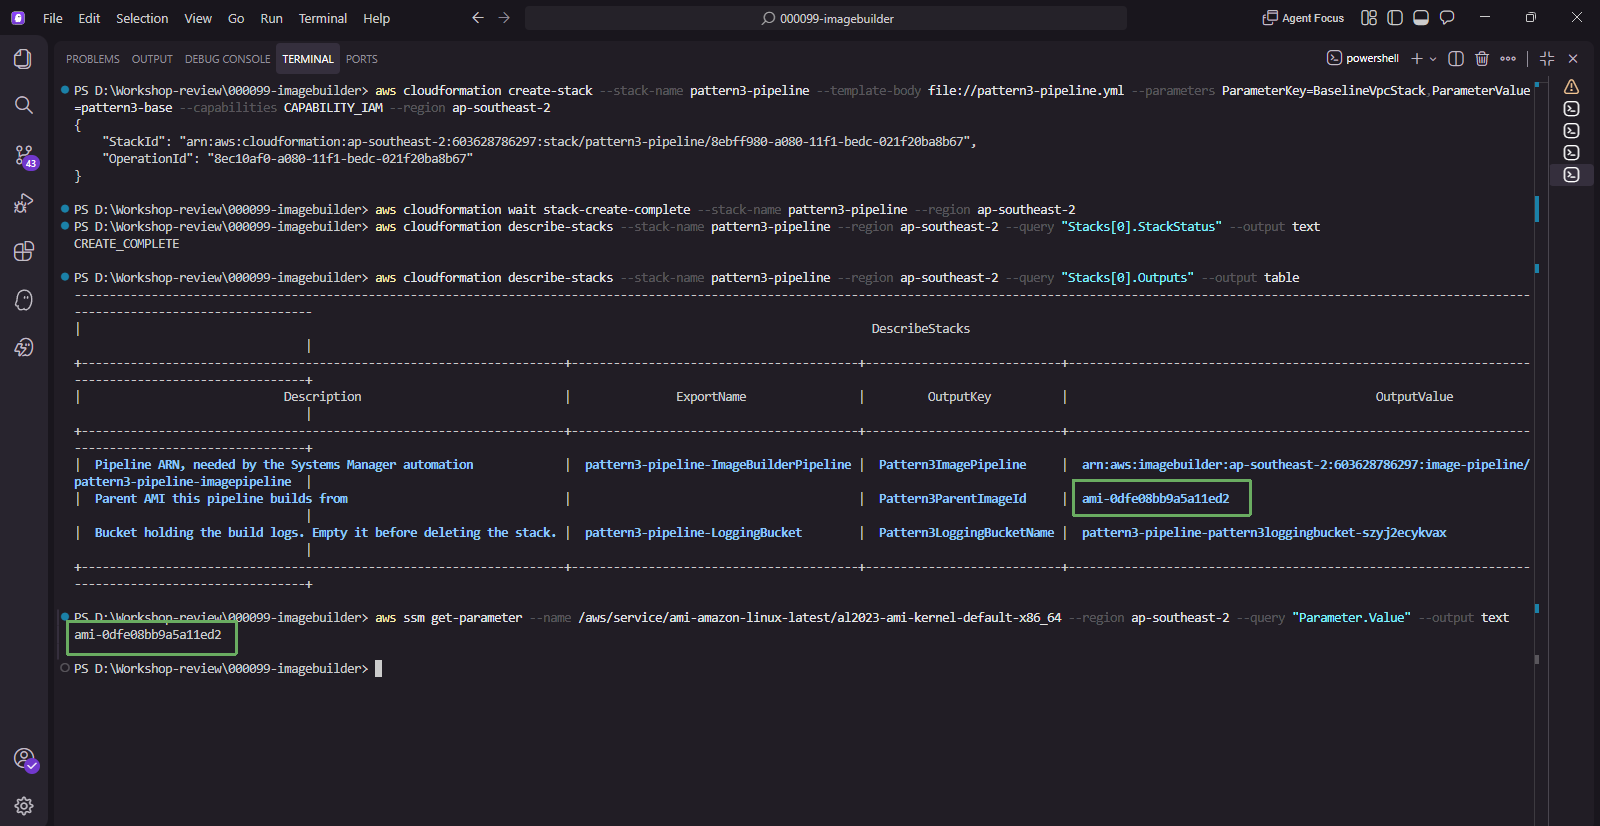
You can check which Amazon Linux 2023 AMI is being used as the Parent Image with the following command. This value should match the Pattern3ParentImageId in the Outputs:
aws ssm get-parameter --name /aws/service/ami-amazon-linux-latest/al2023-ami-kernel-default-x86_64 --region ap-southeast-2 --query "Parameter.Value" --output text
If you deployed using CloudFormation, you can skip the manual steps below and proceed directly to Execute Builder Pipeline.
Manual Build from Console
This section is for those who want to deeply understand each component of an AMI Pipeline. We will perform the following steps sequentially:
- Create an S3 bucket for logging.
- Create an IAM Role for EC2 Image Builder.
- Create a Security Group for the build instance.
- Create an Image Builder Component.
- Create an Image Builder Recipe.
- Create an Infrastructure Configuration.
- Create an Image Builder Pipeline.
Create S3 Bucket
Due to the nature of the S3 service, when naming an S3 Bucket, we must follow certain rules specified at this URL.
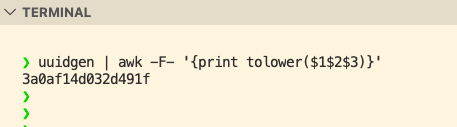
- Generate a unique UUID string with lowercase letters.
uuidgen | awk -F- '{print tolower($1$2$3)}'
([guid]::NewGuid().ToString('N')).Substring(0,12).ToLower()
- Create the S3 Bucket using the prefix
pattern3-loggingcombined with the generated UUID, and block all public access. This bucket only stores internal logs, so there is no reason to expose it to the Internet.
BUCKET="pattern3-logging-$(uuidgen | awk -F- '{print tolower($1$2$3)}')"
echo "Bucket: $BUCKET"

aws s3 mb "s3://${BUCKET}" --region ap-southeast-2

aws s3api put-public-access-block --bucket "$BUCKET" --public-access-block-configuration "BlockPublicAcls=true,IgnorePublicAcls=true,BlockPublicPolicy=true,RestrictPublicBuckets=true" --region ap-southeast-2
$BUCKET = "pattern3-logging-" + ([guid]::NewGuid().ToString('N')).Substring(0,12).ToLower()
Write-Output "Bucket: $BUCKET"

aws s3 mb "s3://$BUCKET" --region ap-southeast-2

aws s3api put-public-access-block --bucket $BUCKET --public-access-block-configuration "BlockPublicAcls=true,IgnorePublicAcls=true,BlockPublicPolicy=true,RestrictPublicBuckets=true" --region ap-southeast-2

Please note down the bucket name, you will need it in the IAM Role creation step and when configuring logging for the pipeline.
More details about creating an S3 bucket can be found at Creating a bucket.
Create IAM Role
This IAM Role will be used for EC2 Image Builder acting as an instance profile for the temporarily created EC2 instance. This EC2 instance will perform the OS Patching task.
The following is the process to create an IAM Role:
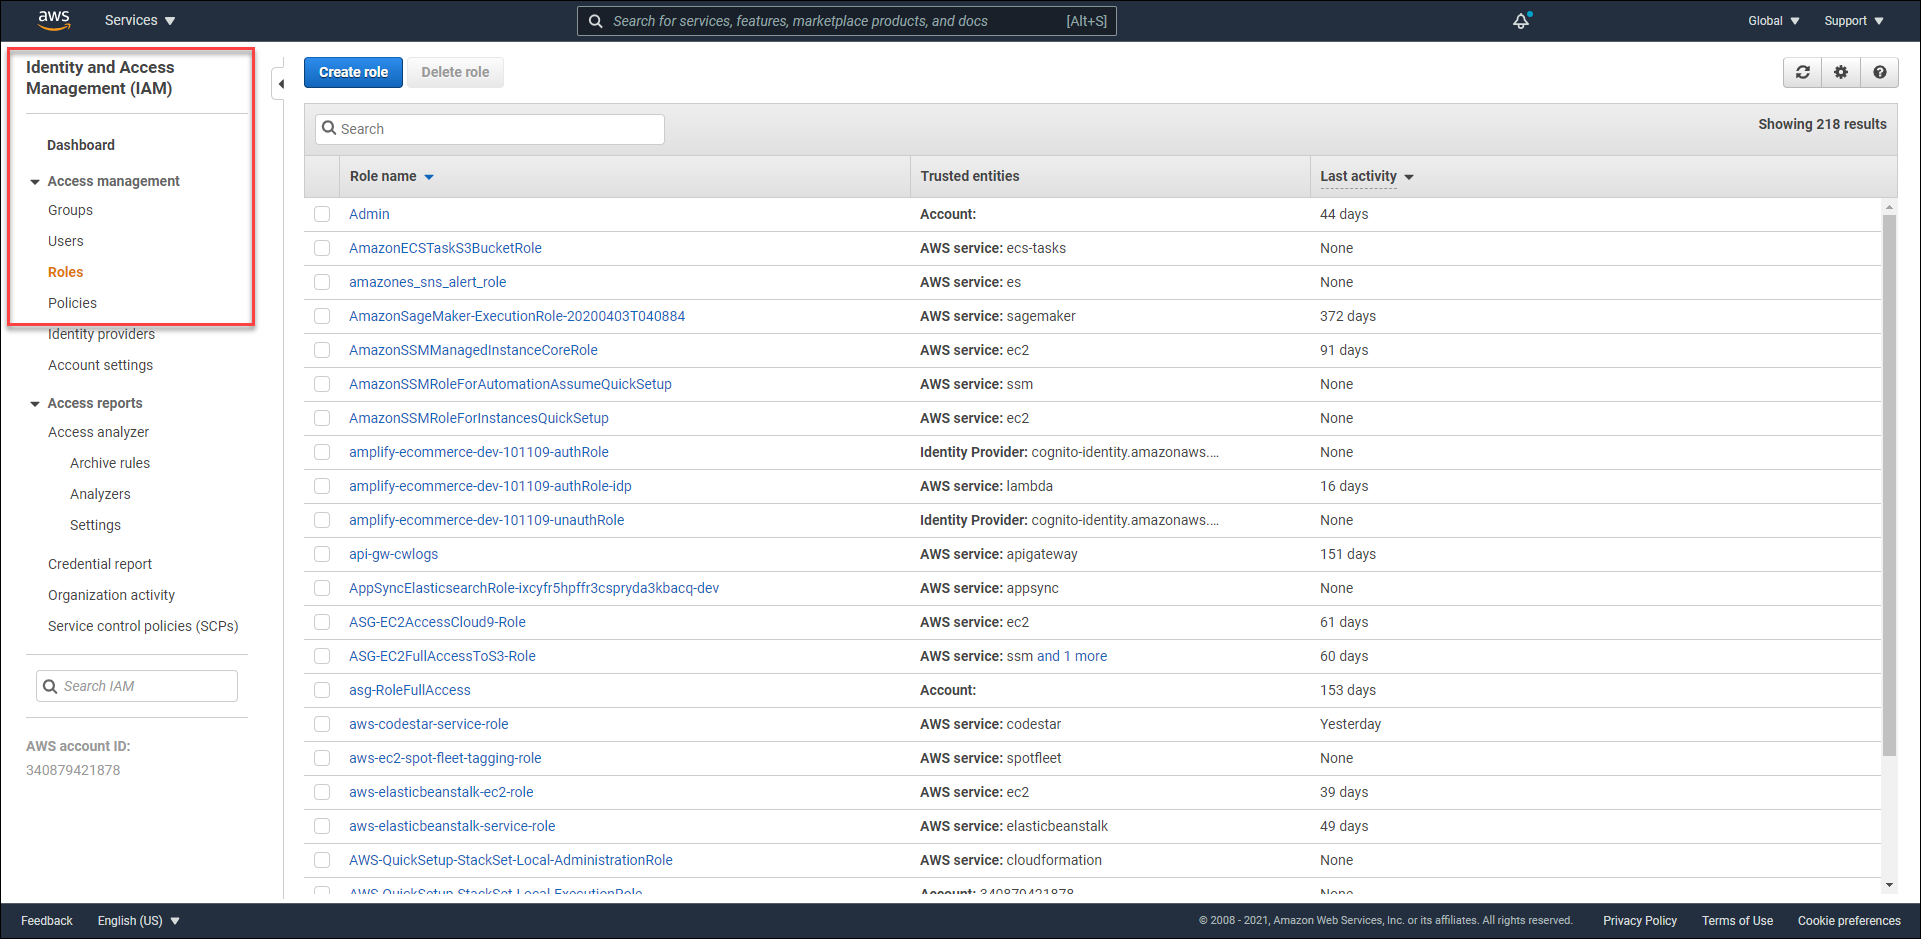
- Log in to the AWS Console and access the IAM service at - https://console.aws.amazon.com/iam/.
- In the left navigation pane, select
Rolesand click theCreate rolebutton.
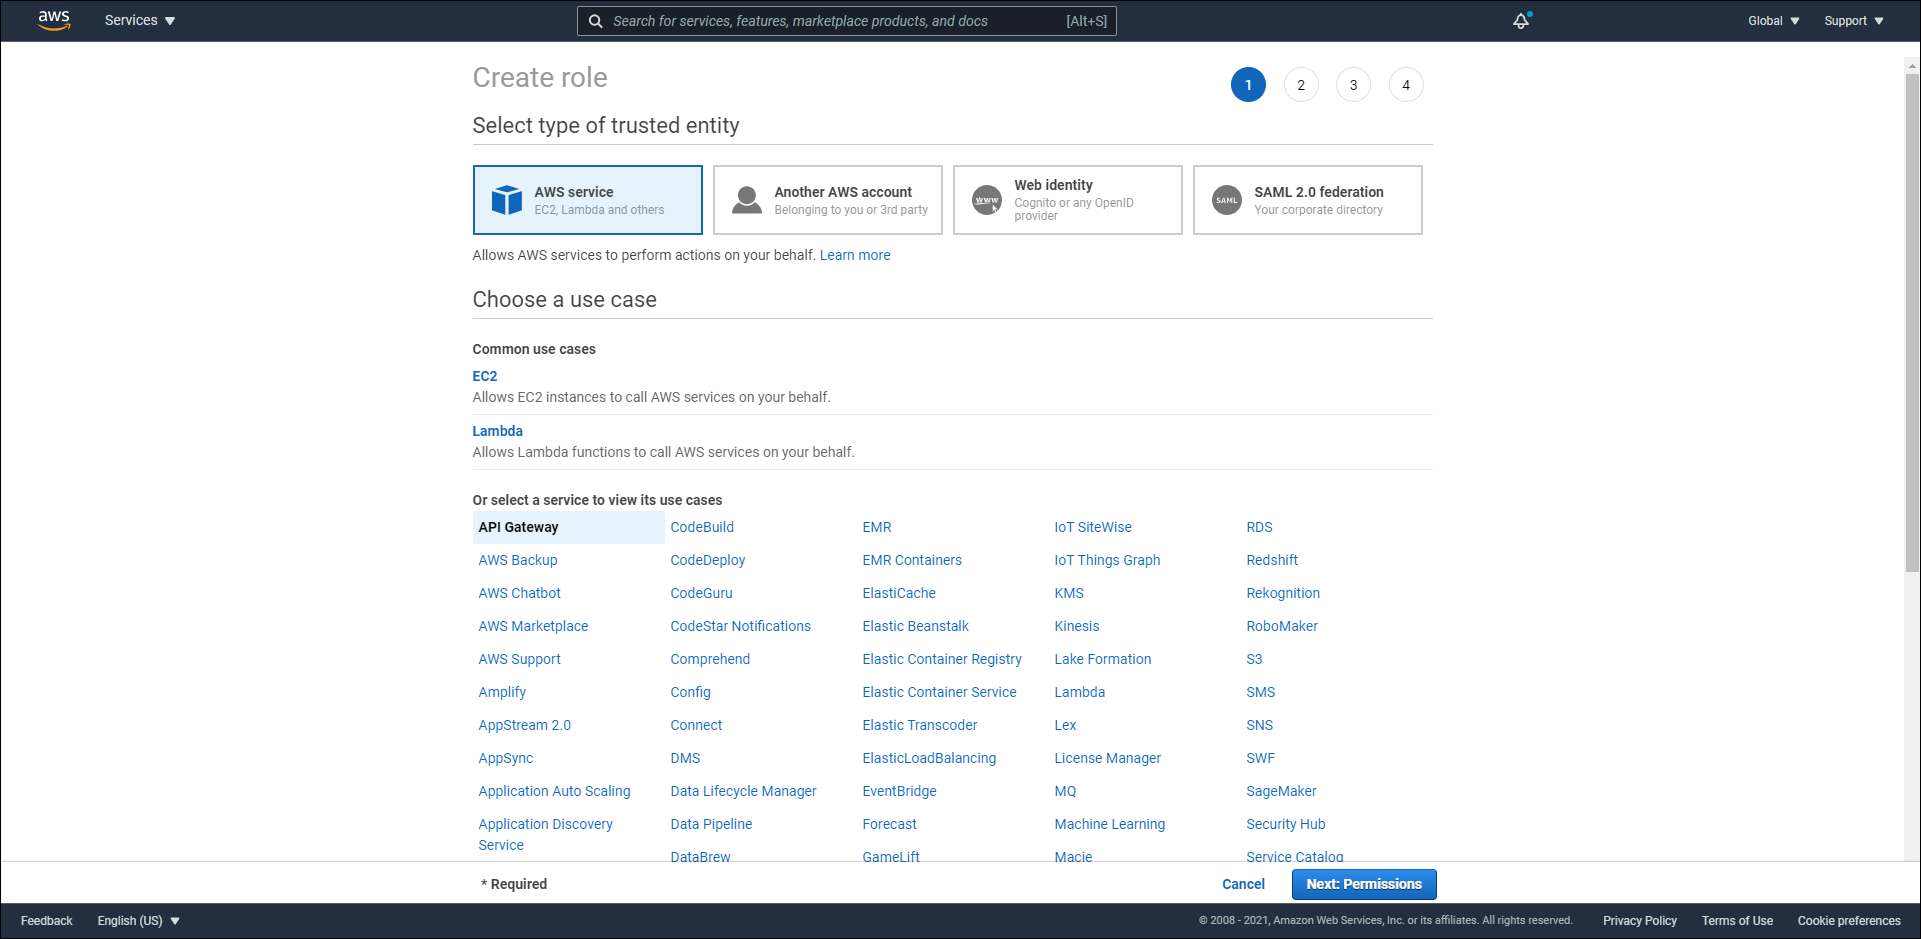
- On the Select trusted entity screen, choose
AWS serviceand set Use case toEC2, then clickNext.
- On the
Add permissionsscreen, search for and select the following policies:- EC2InstanceProfileForImageBuilder
- AmazonSSMManagedInstanceCore
- Click
Nextto go to theName, review, and createscreen. - Enter the name
pattern3-recipe-instance-rolealong with a detailed description.
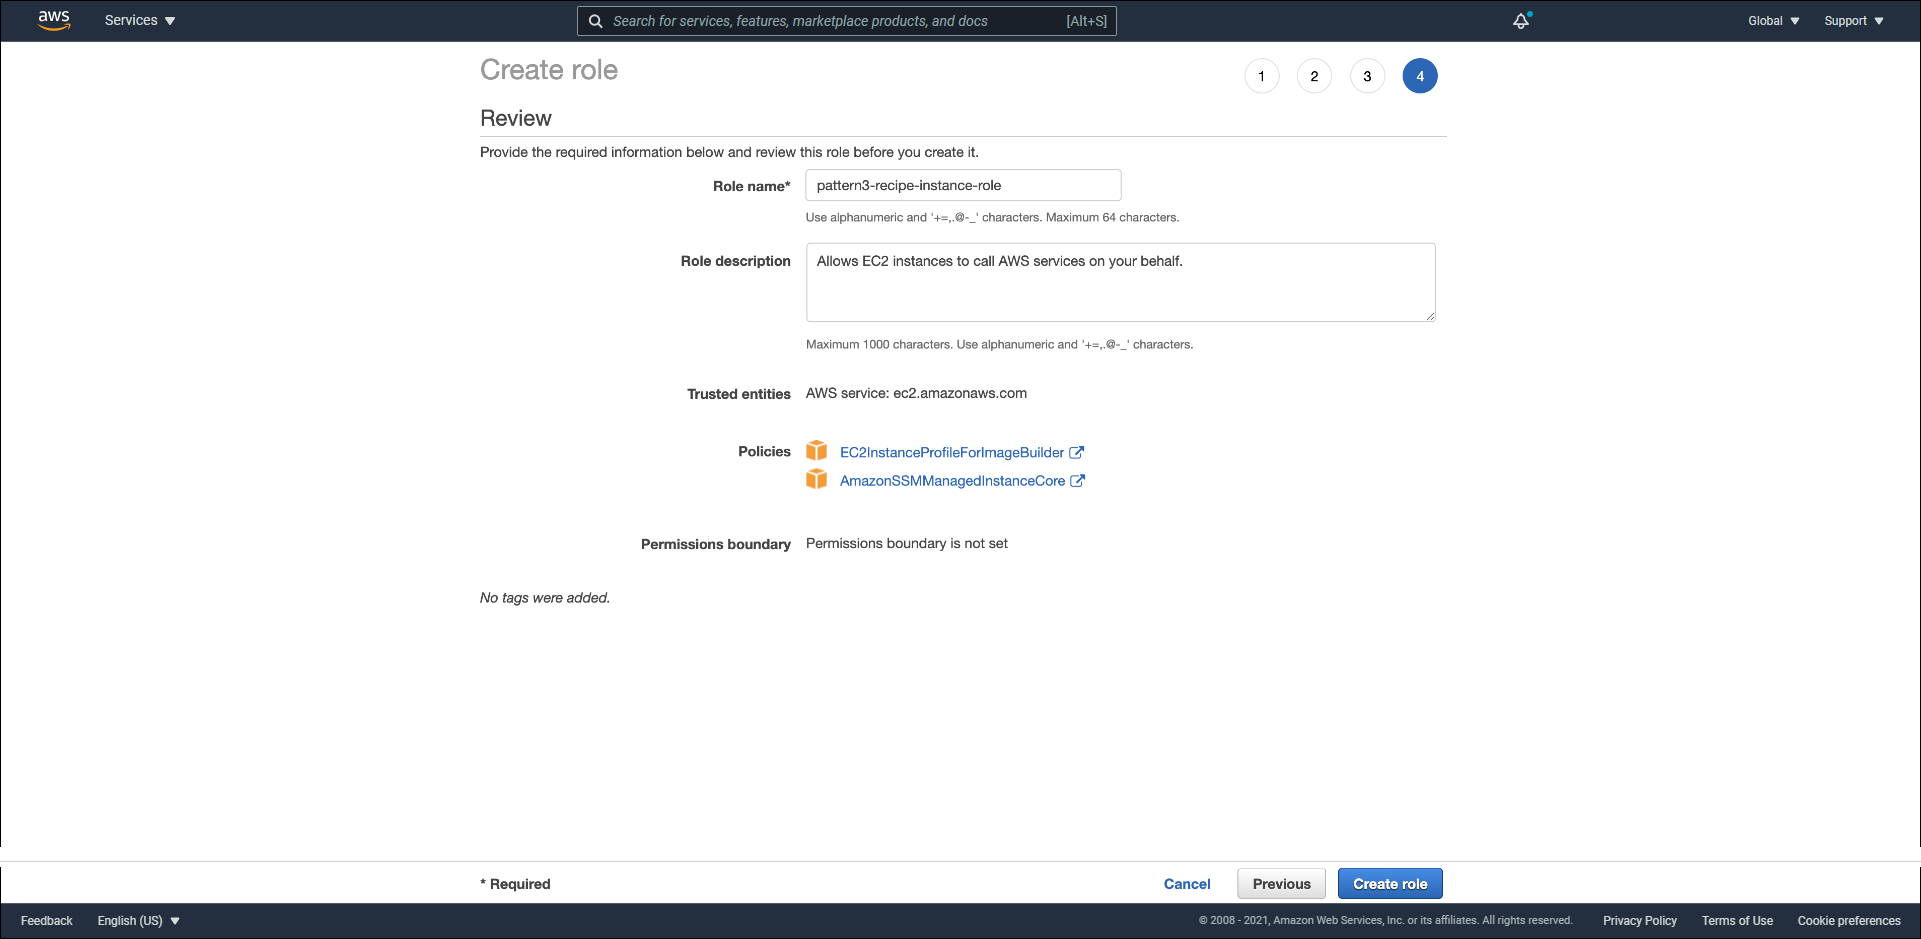
- Proceed to create it by clicking
Create role. - Once successfully created, in the list of IAM roles, select
pattern3-recipe-instance-role. - In the
Permissionstab, clickAdd permissionsand selectCreate inline policy.
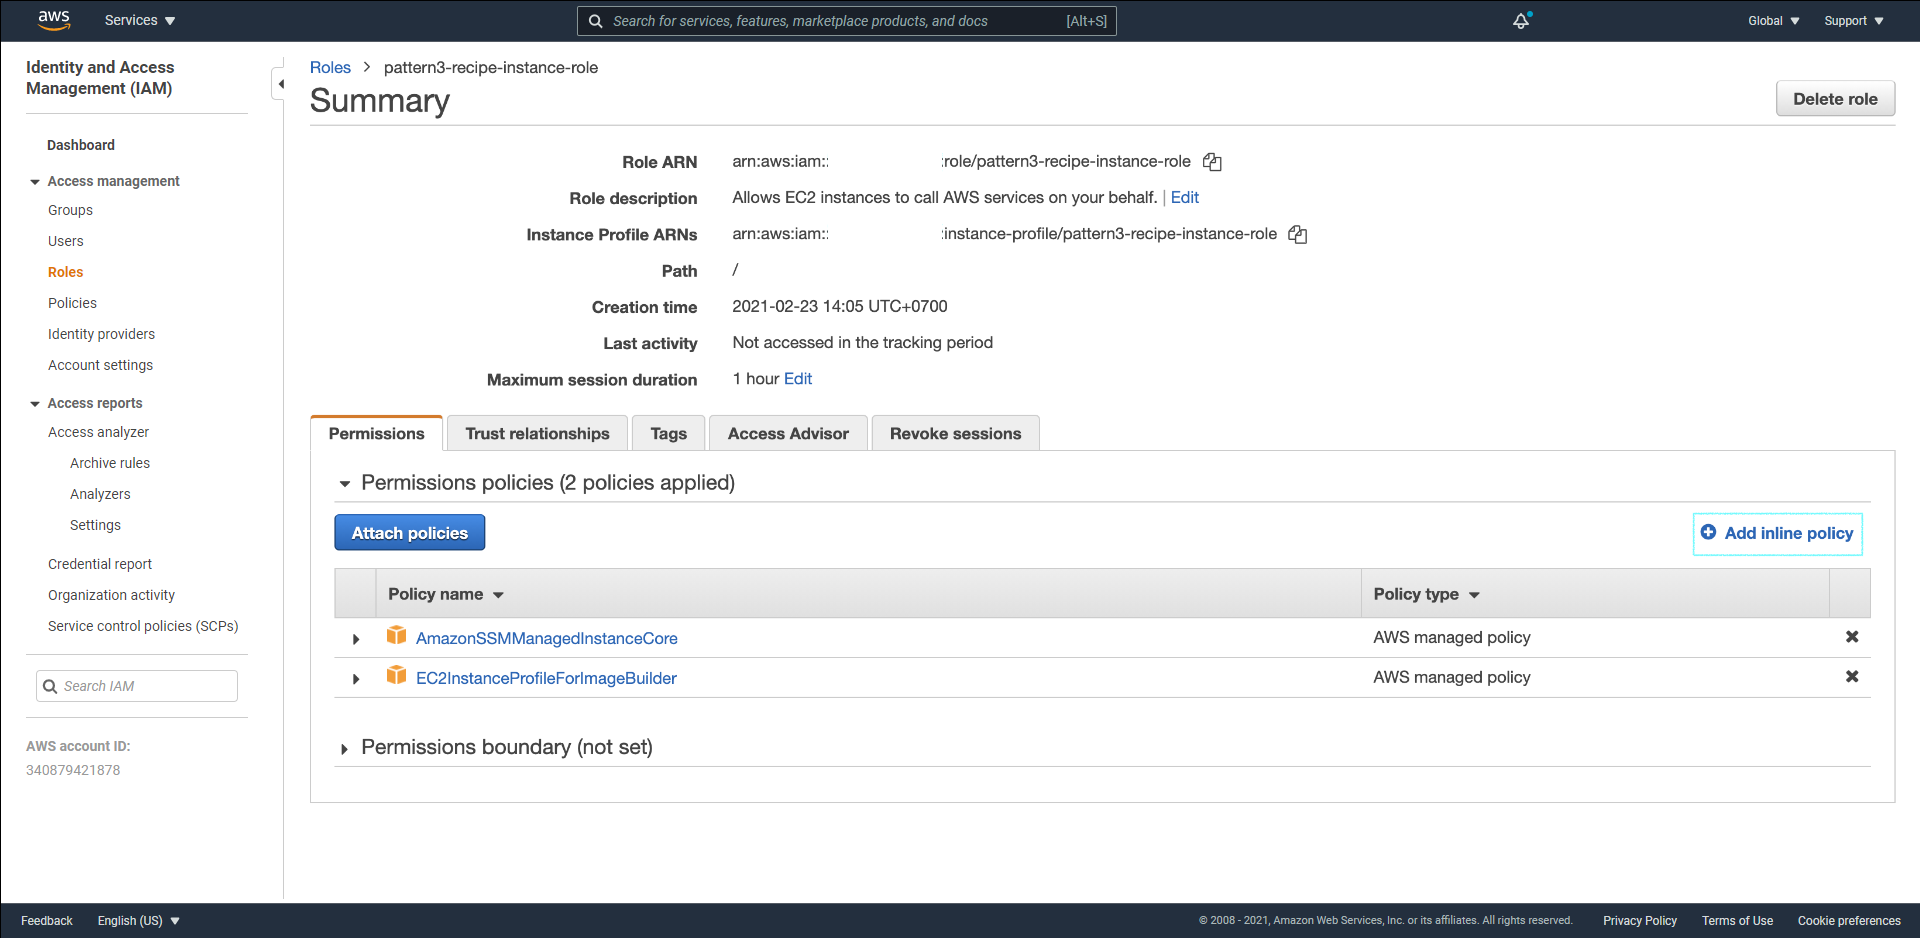
- Switch to JSON mode and use the following specification. Replace
<S3_BUCKET_NAME>with the S3 Bucket name from the previous step.
{
   "Version": "2012-10-17",
   "Statement": [
      {
         "Sid": "WriteBuildLogs",
         "Effect": "Allow",
         "Action": "s3:PutObject",
         "Resource": "arn:aws:s3:::<S3_BUCKET_NAME>/*"
      },
      {
         "Sid": "DescribeBucket",
         "Effect": "Allow",
         "Action": [
            "s3:GetBucketLocation",
            "s3:ListBucket"
         ],
         "Resource": "arn:aws:s3:::<S3_BUCKET_NAME>"
      }
   ]
}
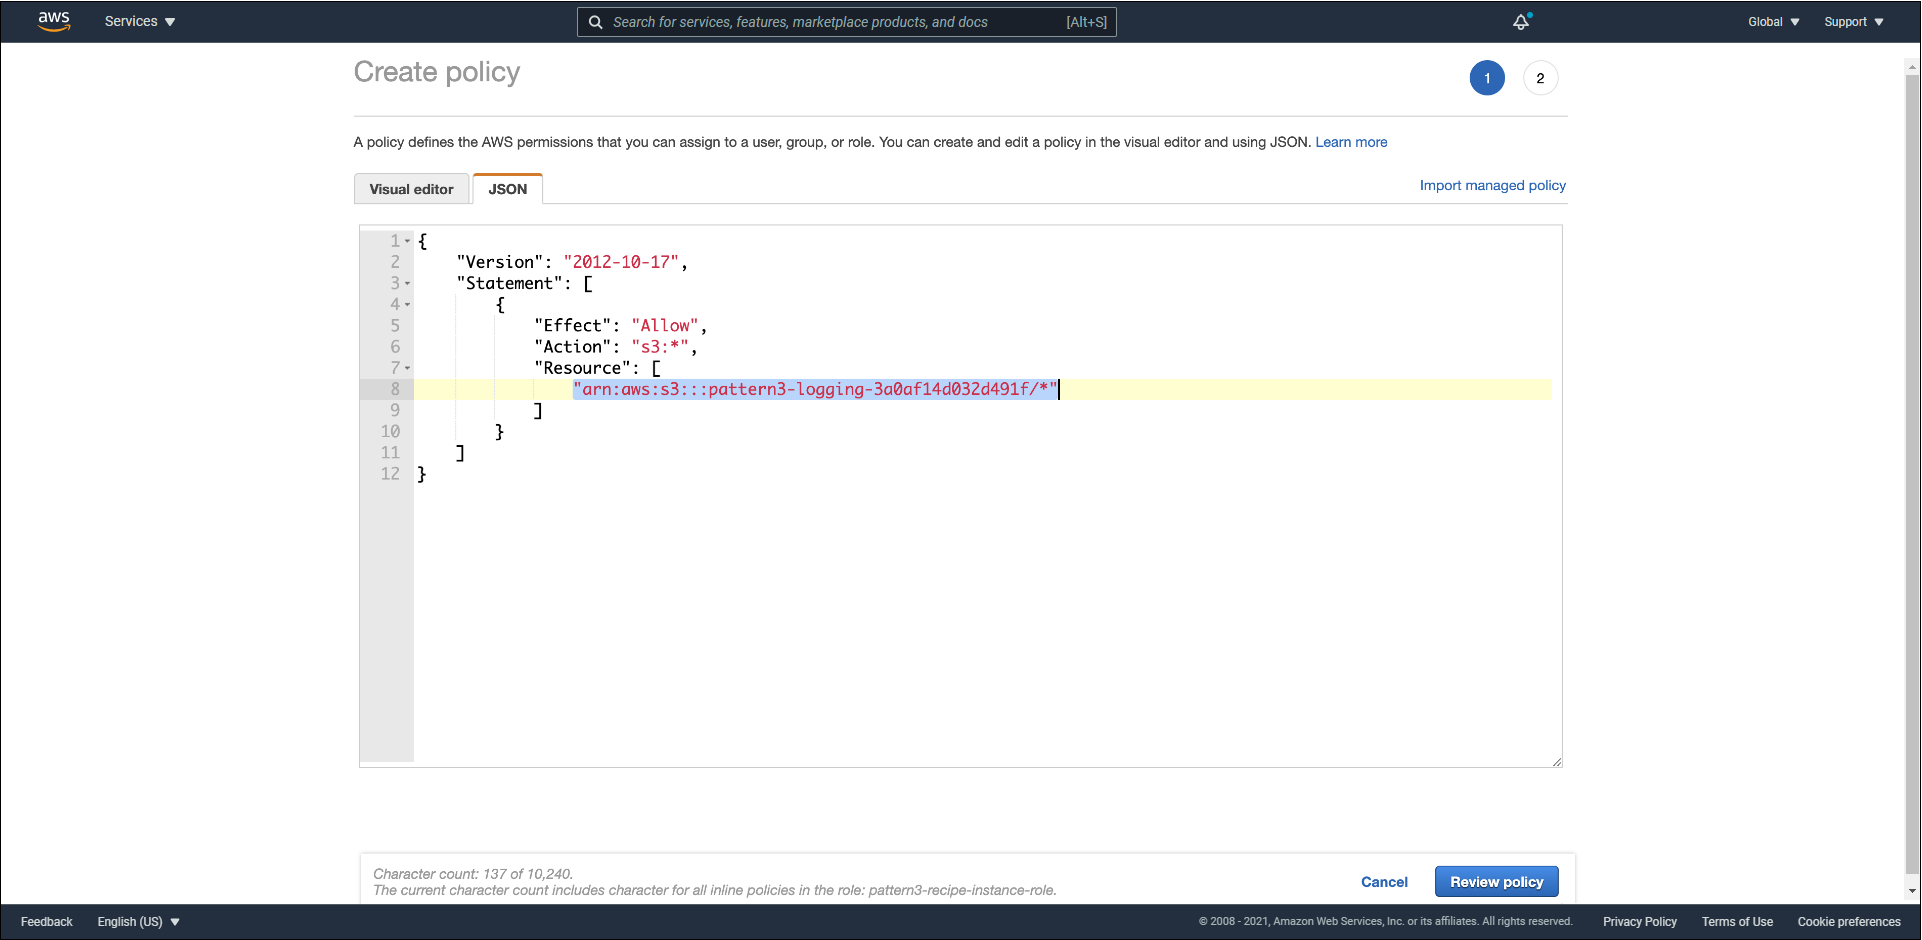
- Click
Next. - Enter the policy name and click
Create policyto finish.
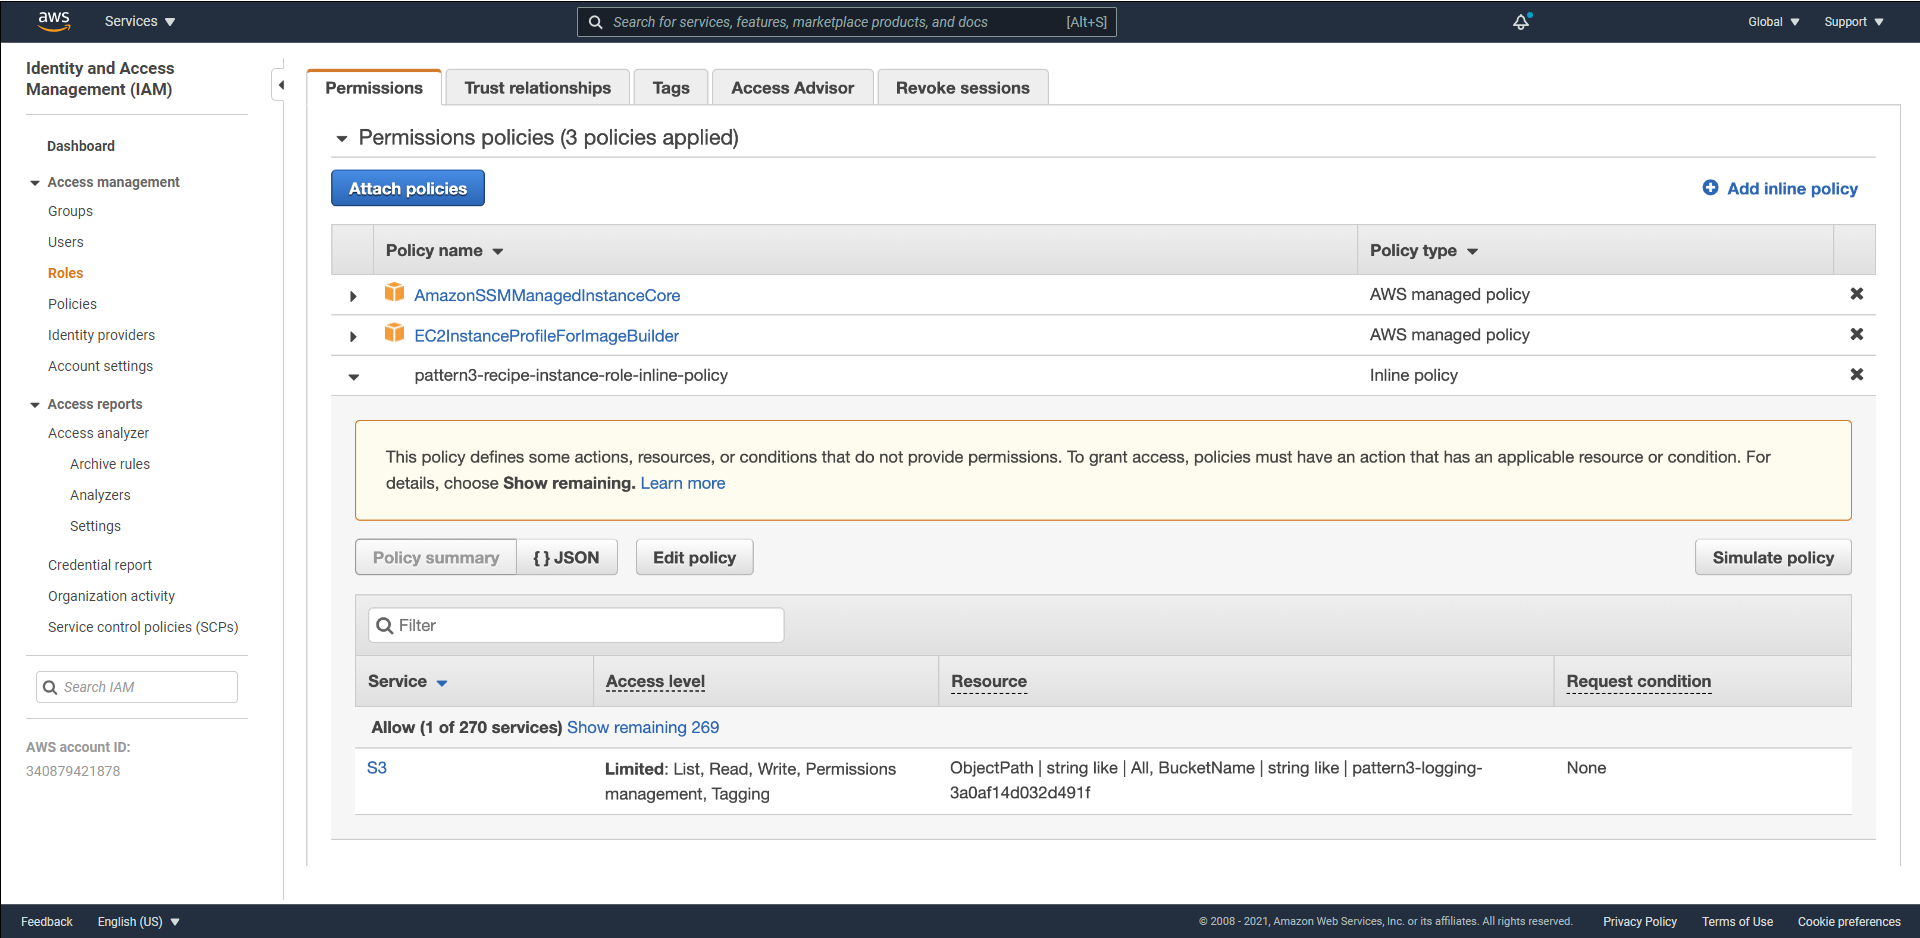
Pay attention to the scope of permissions in the specification above. The build instance only needs to write logs to one exact bucket, so the policy only opens s3:PutObject on that bucket. Avoid using "Action": "s3:*" or attaching the managed policy AmazonS3FullAccess, as that grants broader permissions than actually needed.
Create Security Group
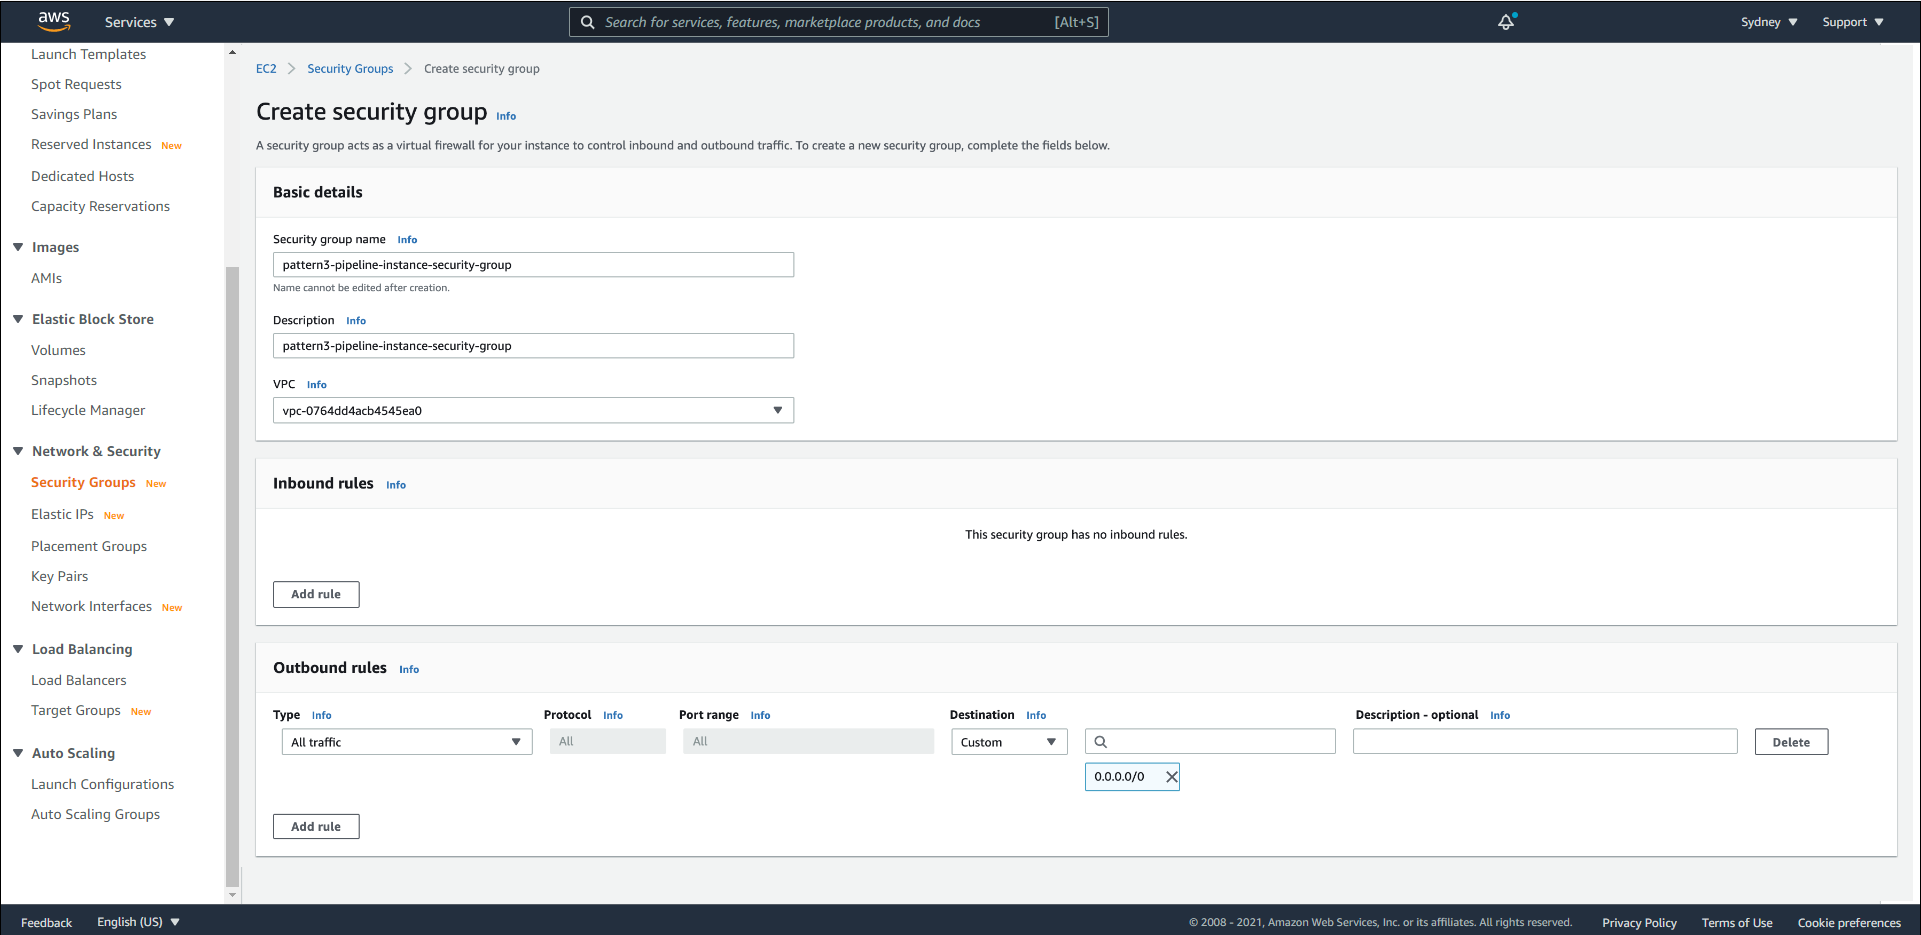
We will need an EC2 Security Group for the temporary EC2 instance. The Security Group does not require any Inbound Rule; however, the default Outbound Rule is needed so the build instance can access the Internet via NAT Gateway to download patches.
- Access the Amazon EC2 service.
- In the left navigation pane, select Security Groups.
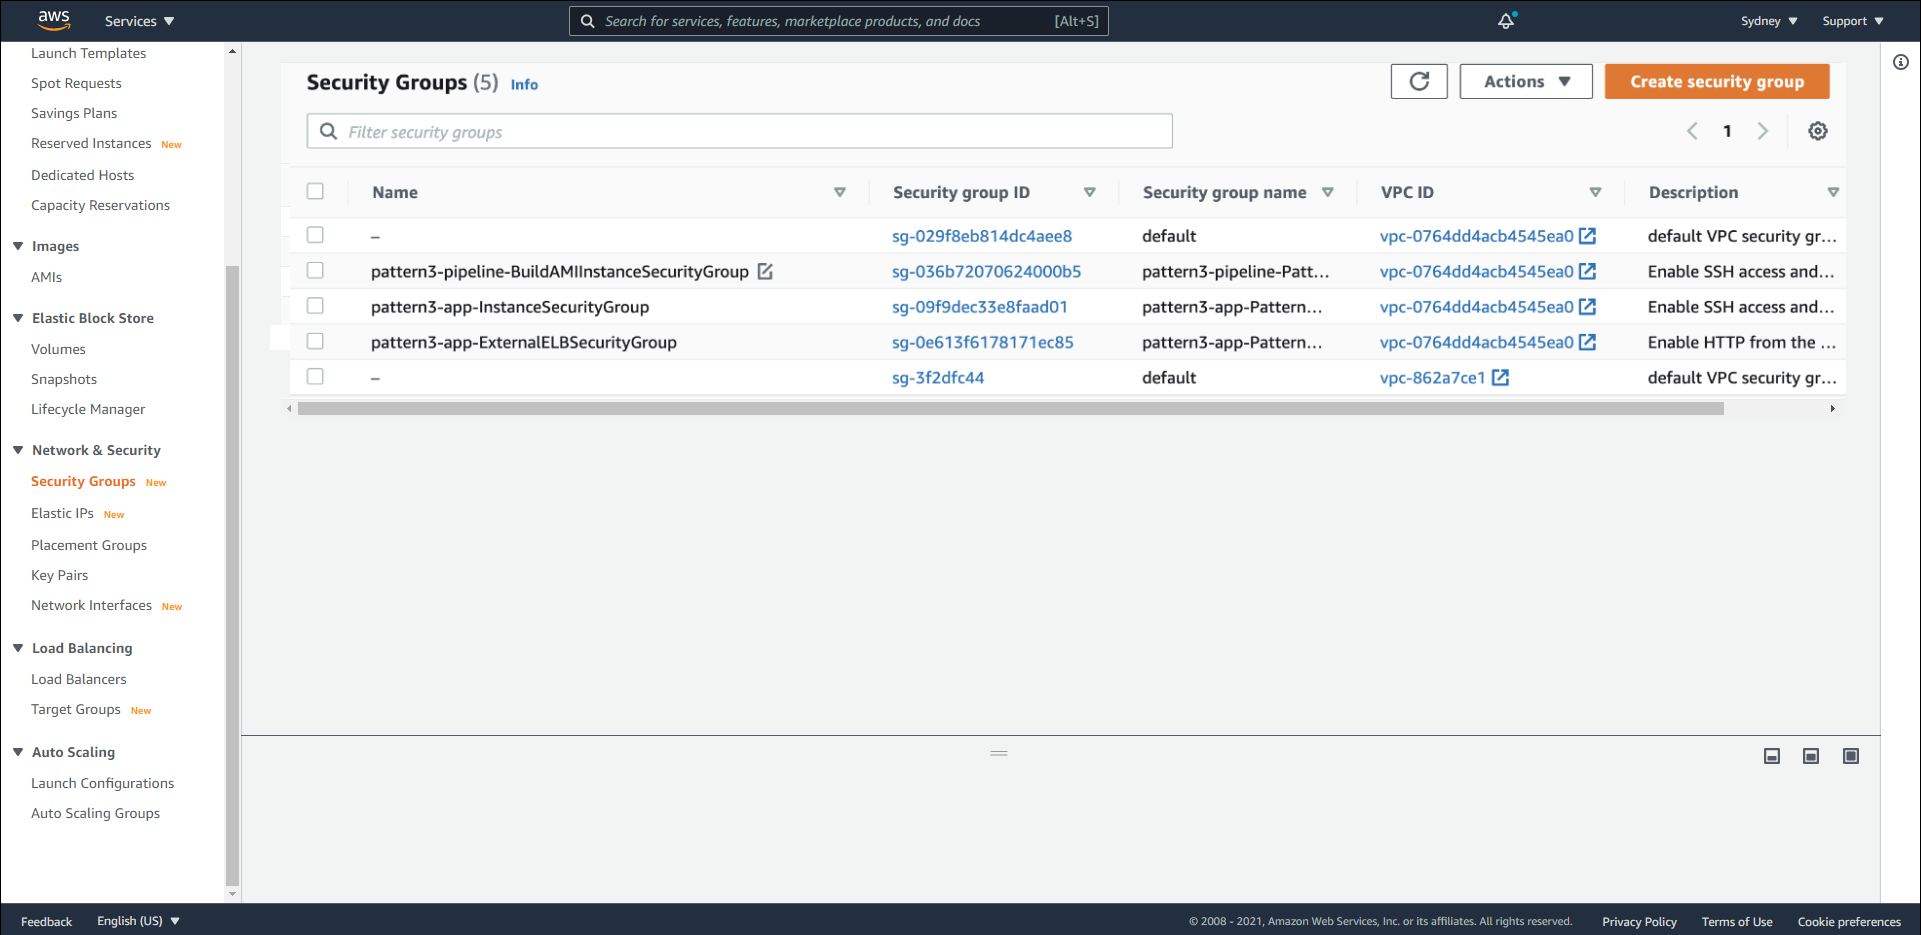
- Click
Create security group. - In the basic details section, enter the name
pattern3-pipeline-instance-security-groupand a description. - In the VPC section, select the VPC created by the
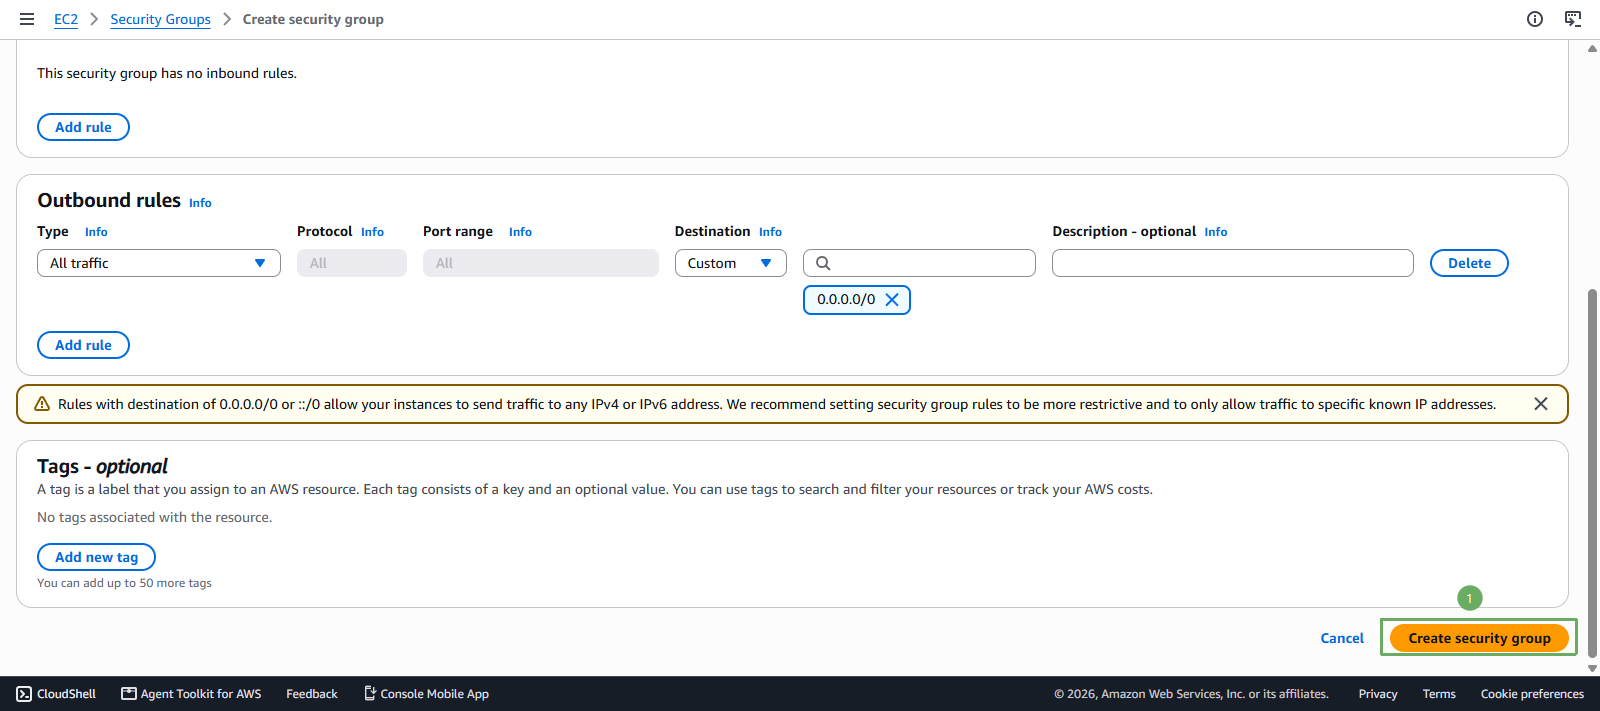
pattern3-baseStack. - For Inbound Rules and Outbound Rules, keep the defaults and do not add any extra values.
- Click
Create security groupto initialize.
Create a Builder Component
We will proceed to create a Component of the EC2 Image Builder service.
- Access the EC2 Image Builder service.
- In the left navigation pane, select Components.
- Click the
Create componentbutton. - Proceed to choose the following values:
- Image Operating System (OS):
Linux. - Compatible OS versions:
Amazon Linux 2023. - Component name:
pattern3-pipeline-ConfigureOSComponent. - Component version:
1.0.0. - Description:
Component to update the OS with latest package versions.
- Image Operating System (OS):
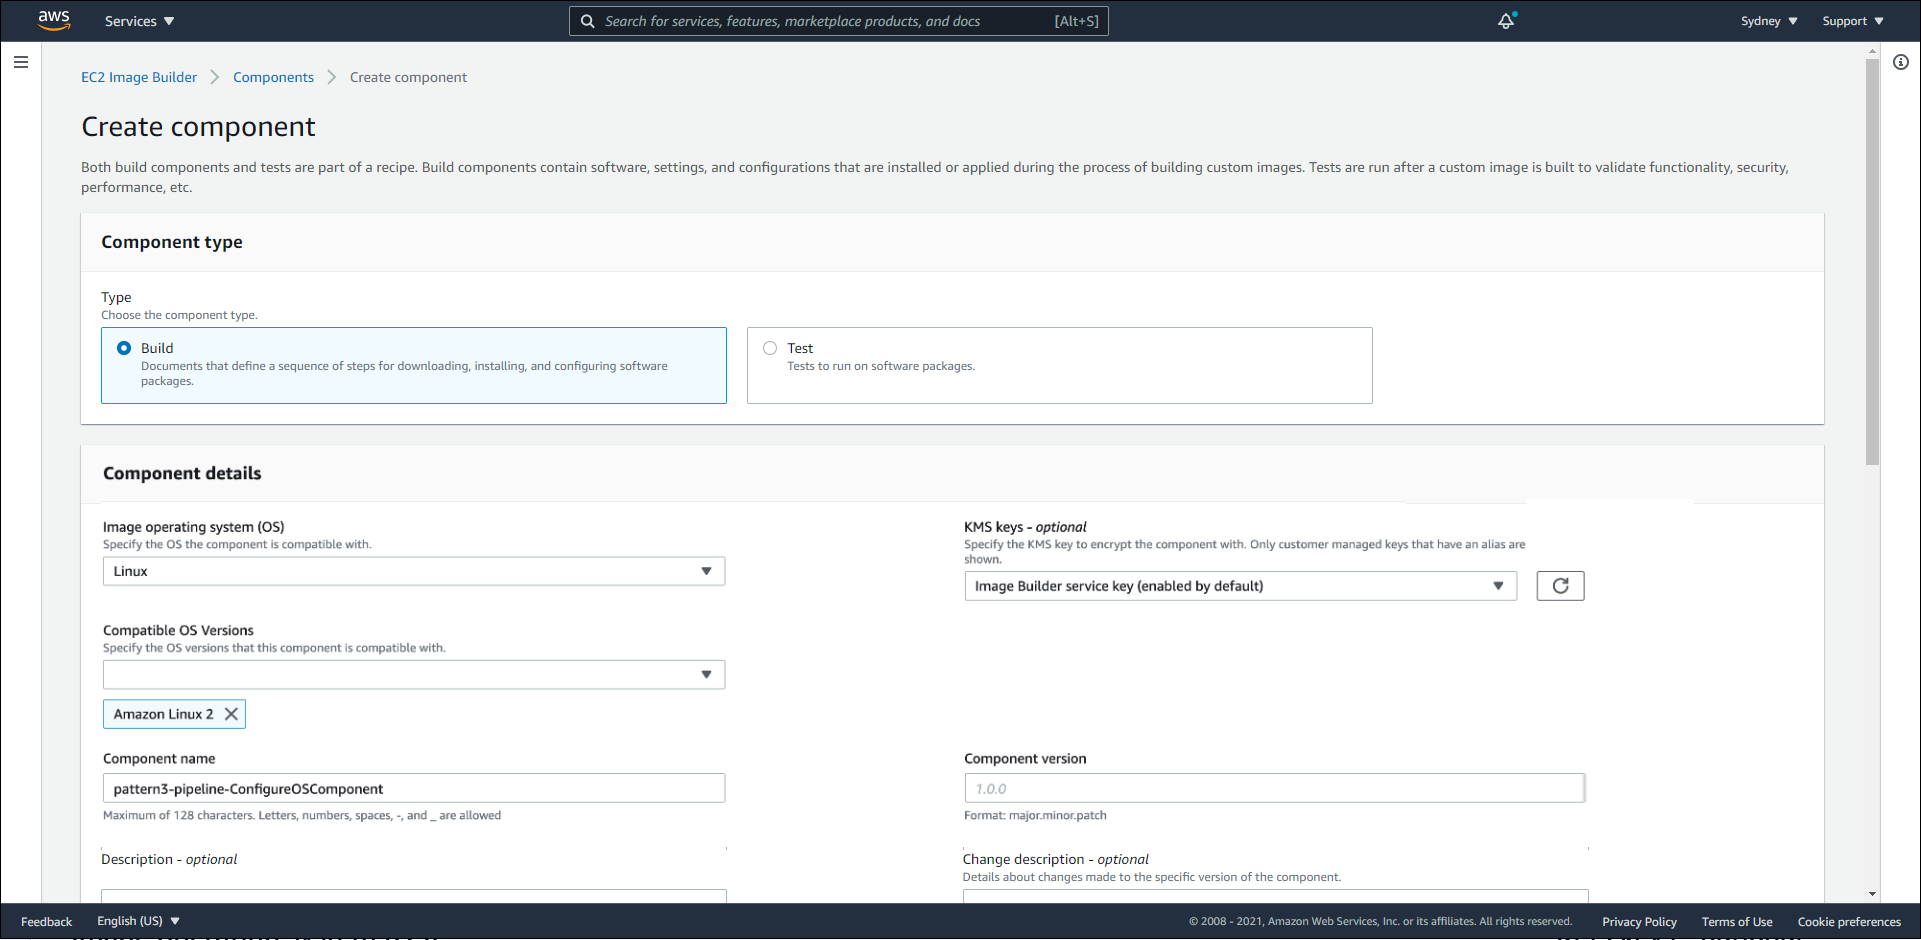
The illustration may show Amazon Linux 2. Please select Amazon Linux 2023, because Amazon Linux 2 has reached its end of support.
- In the
Definition documentsection, selectDefine document content. - Copy and paste the following specification:
name: ConfigureOS
description: Update the operating system to the latest available packages
schemaVersion: 1.0
phases:
  - name: build
    steps:
      - name: UpdateOS
        action: UpdateOS
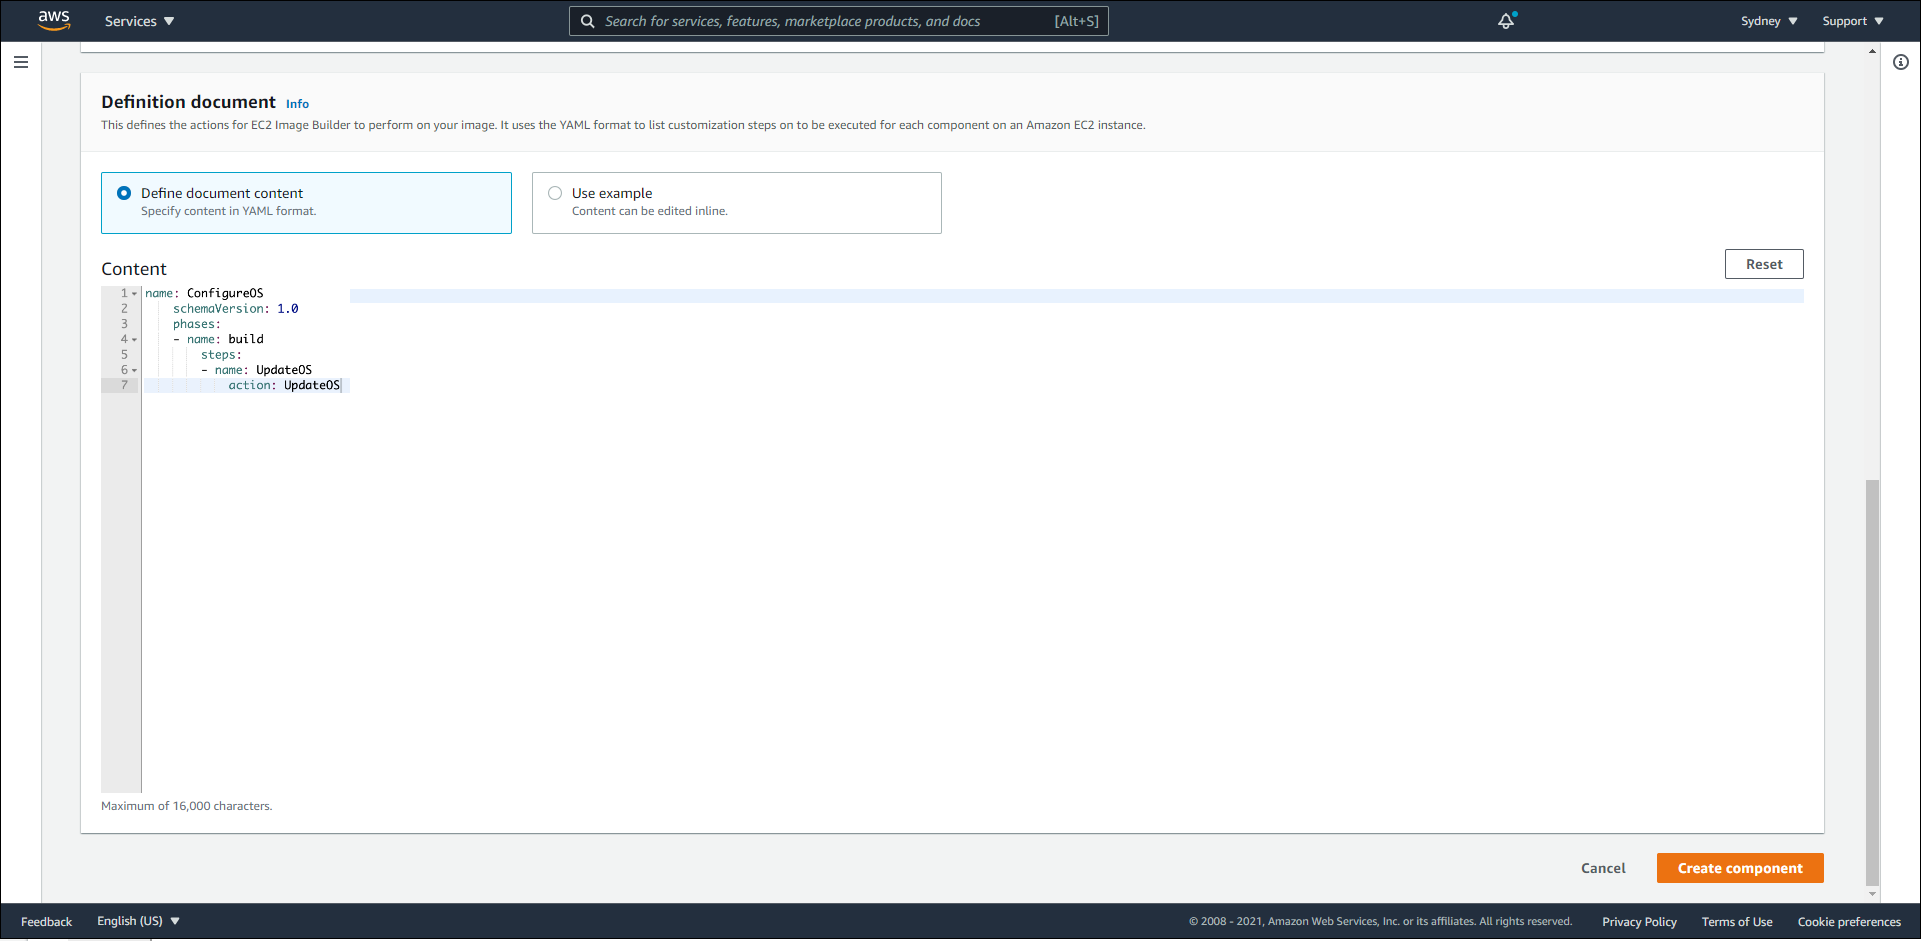
- Click the
Create componentbutton to proceed with initialization.
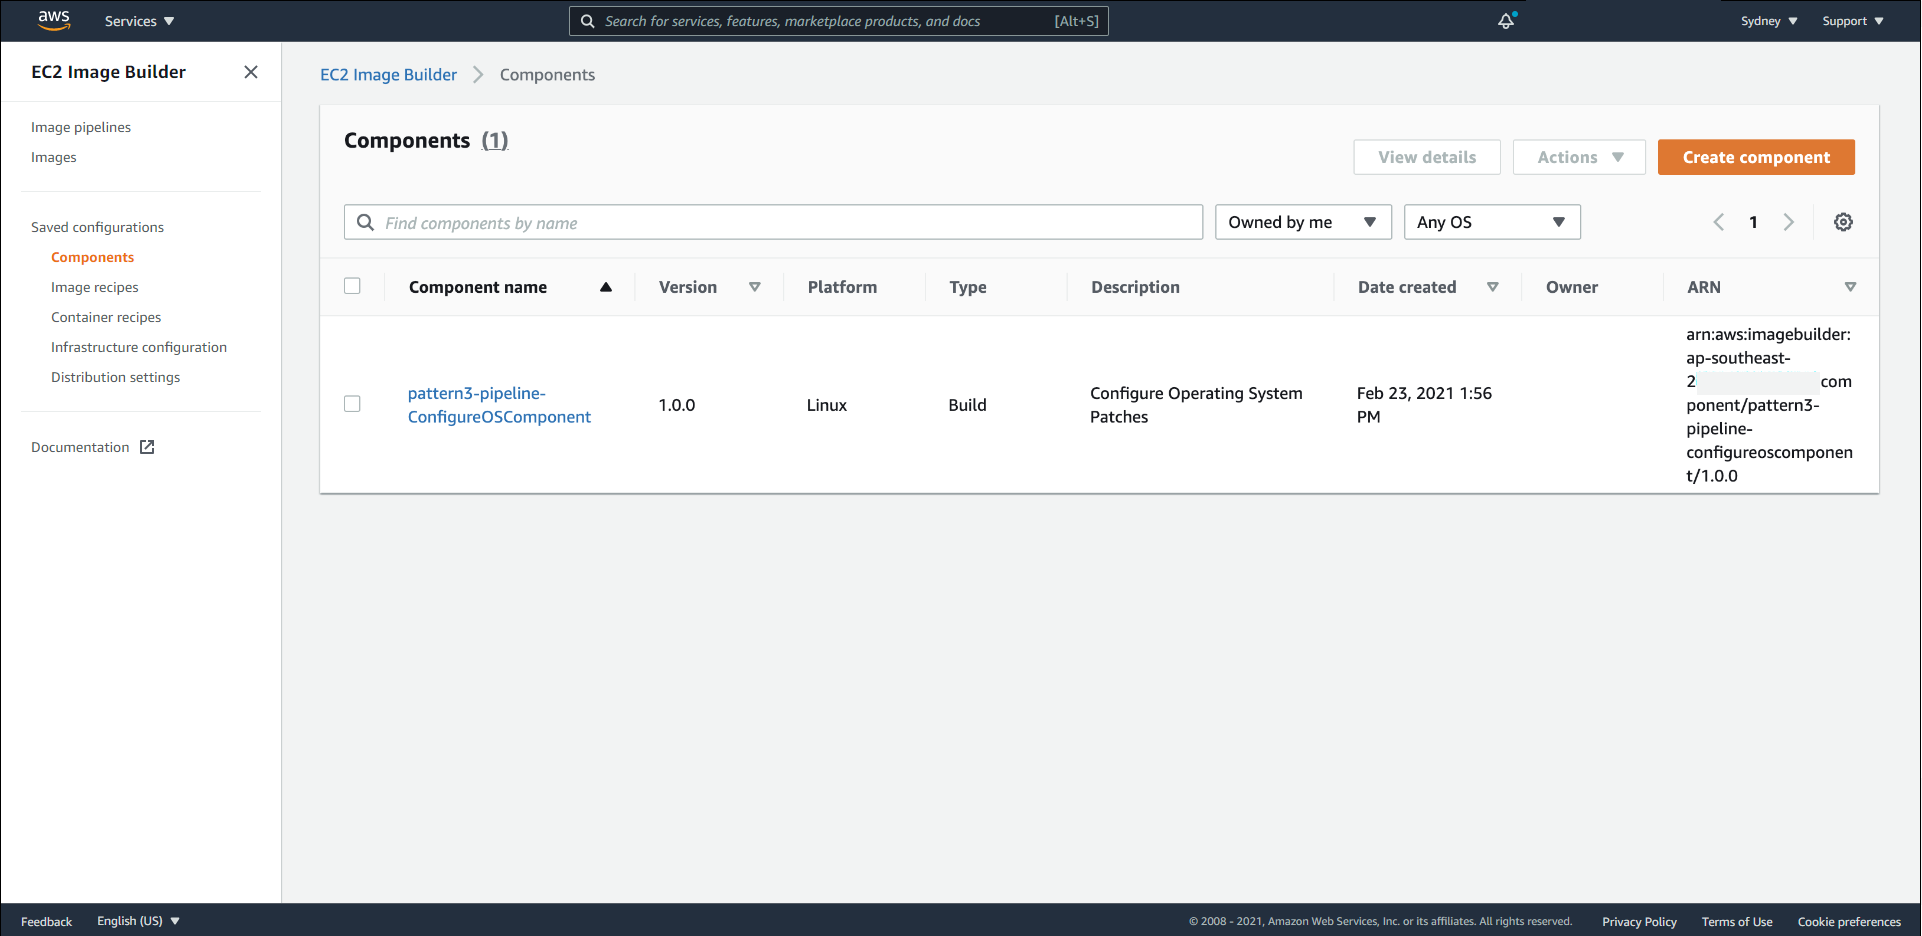
In this lab, we simply define an UpdateOS action to update all packages of the operating system. On Amazon Linux 2023, UpdateOS will run dnf instead of yum as on Amazon Linux 2, but the component specification remains unchanged. You can refer to other action modules at Action modules reference.
Create a Builder Recipe
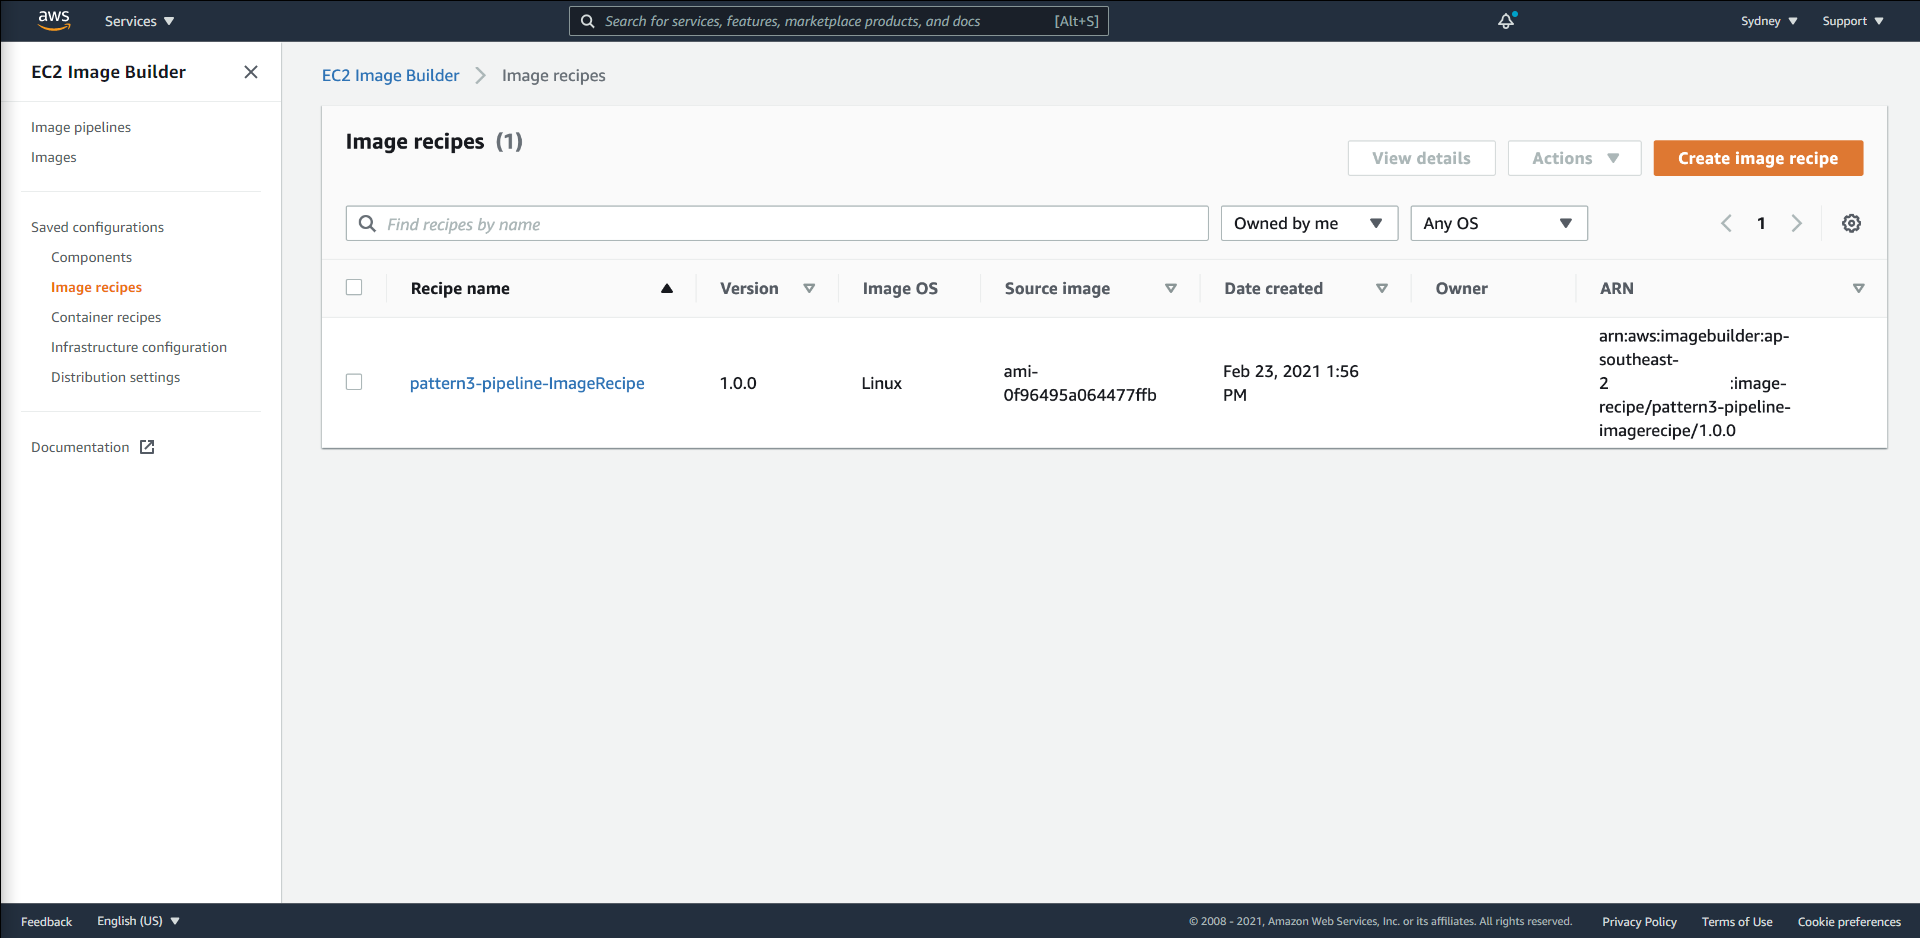
Before defining the Builder Pipeline, we must have a Builder Recipe.
- Access the EC2 Image Builder service.
- In the left navigation pane, select Image recipes.
- Click the
Create image recipebutton. - In the Recipe details section, enter the following values:
- Name:
pattern3-pipeline-ImageRecipe. - Version:
1.0.0. - Description:
Pattern3 Configure OS Recipe.
- Name:
- In the Base image section, select
Select managed images, then:- Image operating system (OS):
Amazon Linux. - Image origin:
Quick start (Amazon-managed). - Image name: select the Amazon Linux 2023 x86 row.
- Auto-versioning options: select
Use latest available OS versionso each build fetches the latest AL2023 version.
- Image operating system (OS):
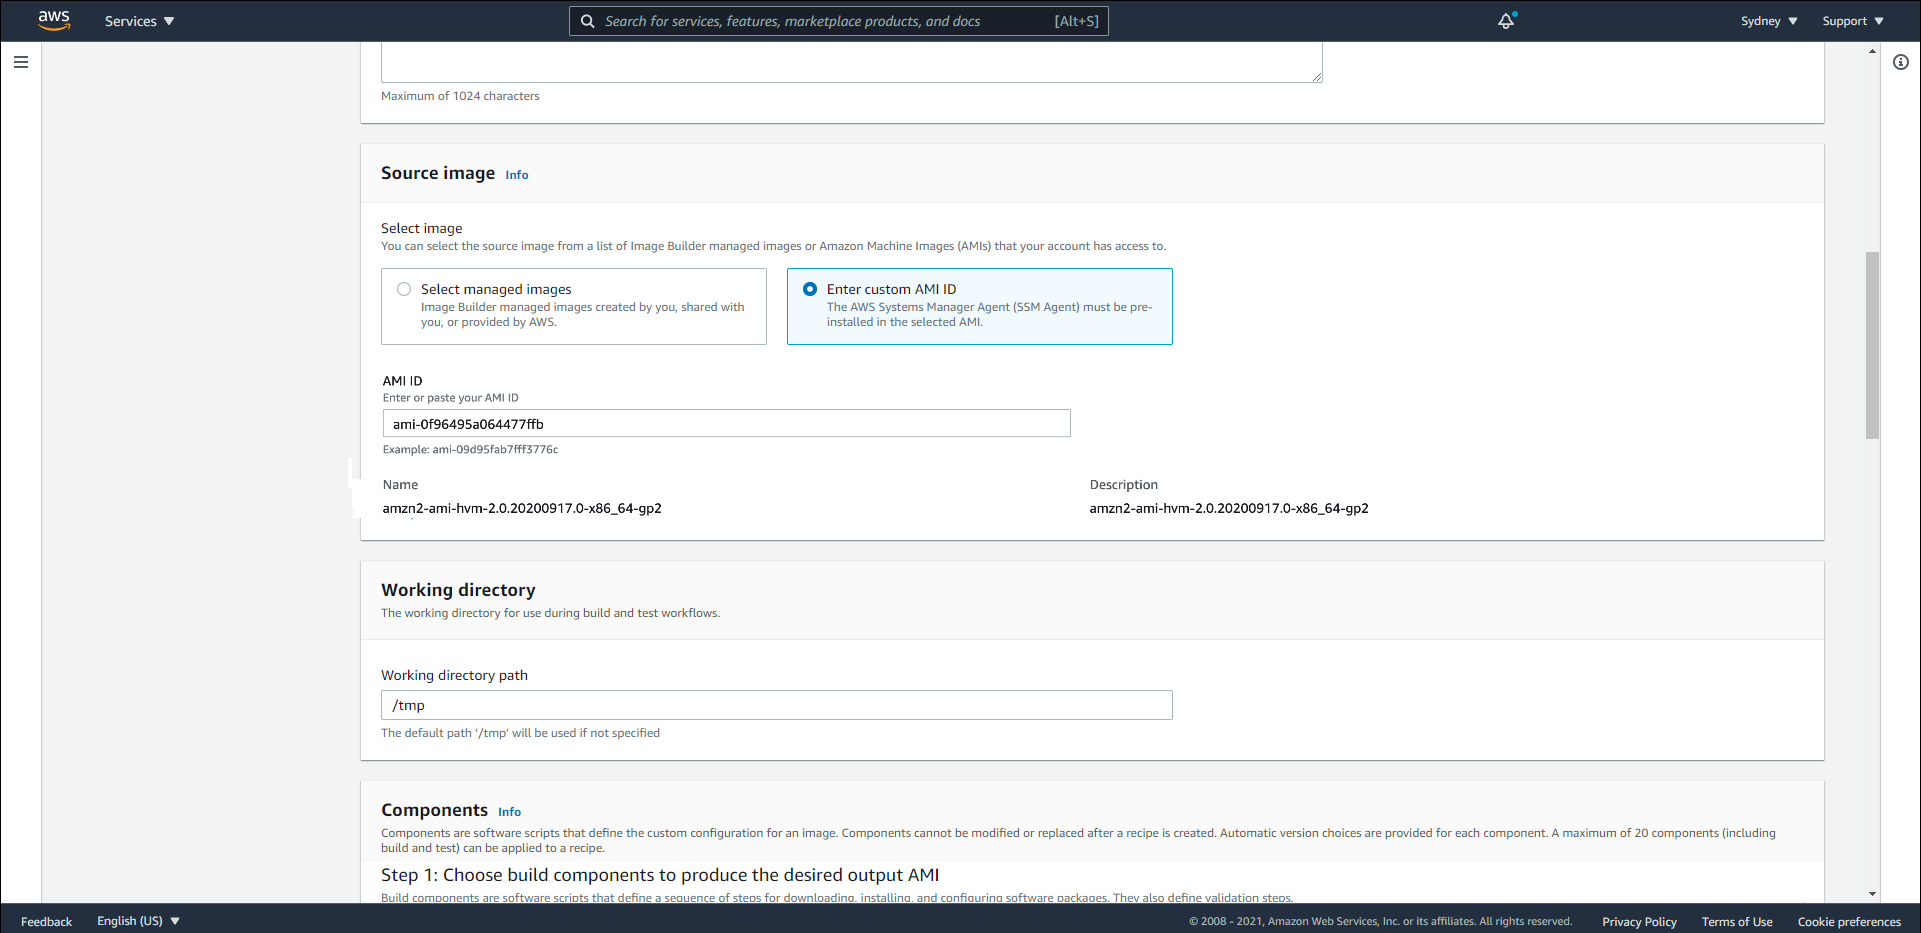
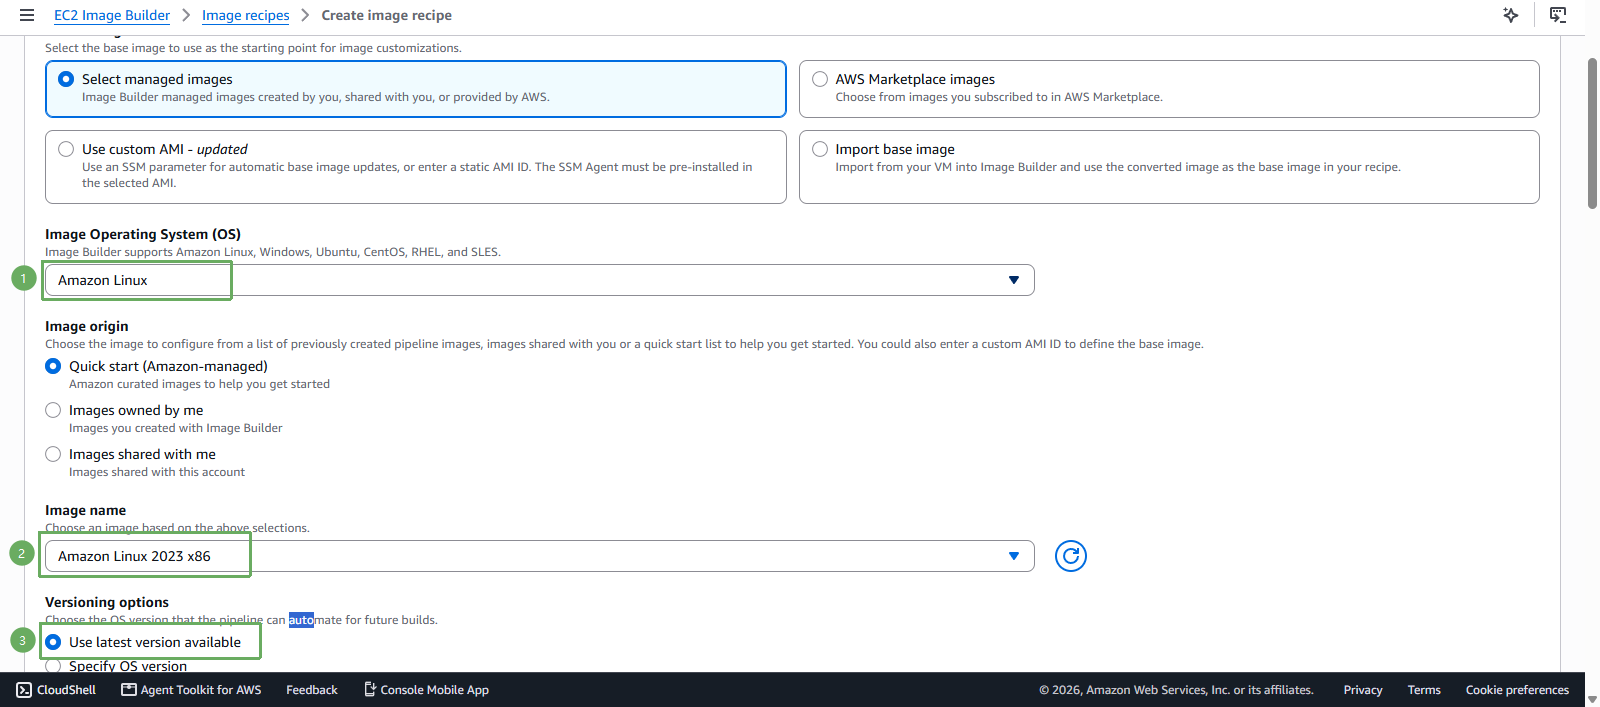
Do not select Enter custom AMI ID and enter a fixed AMI ID. A fixed AMI ID will gradually become outdated and may be marked as deprecated by AWS, causing the pipeline to start from an obsolete image. Choosing a managed image along with Use latest available OS version ensures each build starts from the latest Amazon Linux 2023 release, adhering to the spirit of a patching lab.
- In the Instance configuration section, leave the defaults. For Storage, it’s recommended to switch the
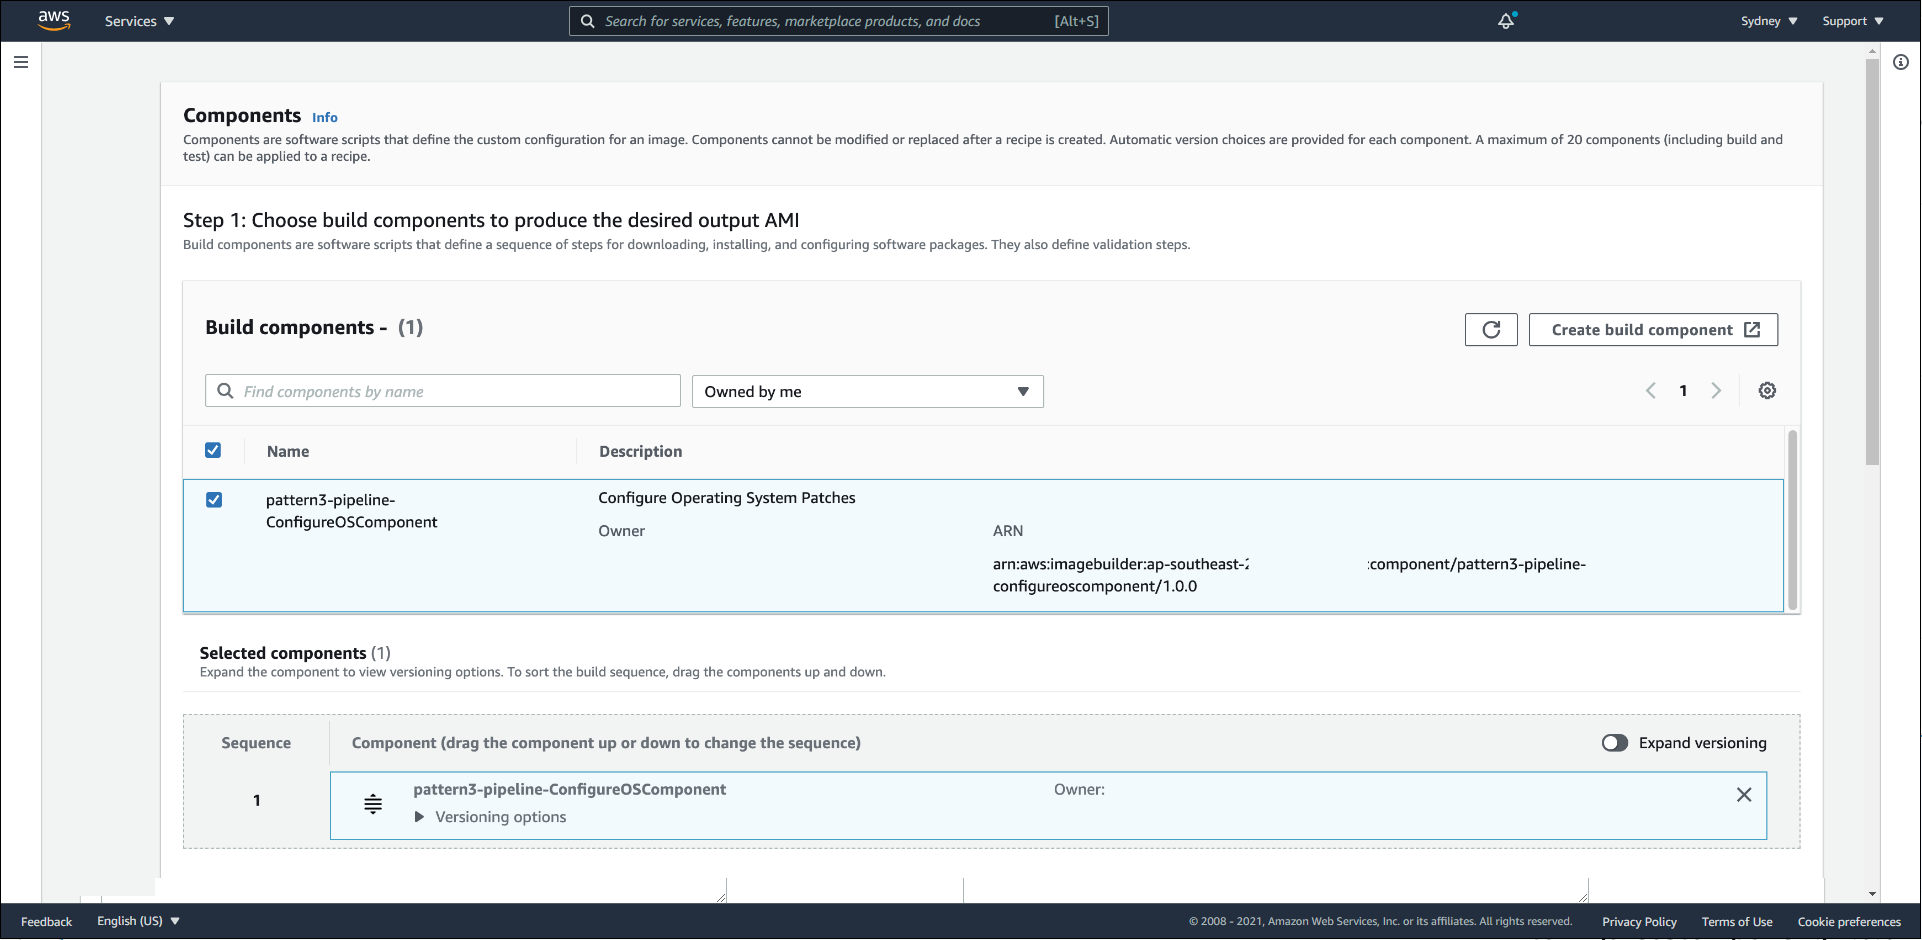
Volume typetogp3for lower cost and faster performance thangp2. - In the Components section, select the Component created in the previous step. You can quickly find it using the
Owned by mefilter.
- Click the
Create recipebutton to proceed with initialization.
Create Infrastructure Configuration
The Infrastructure Configuration describes where the AMI is built: instance type, VPC, subnet, security group, and where to write logs. This is an independent resource that must be created before creating the pipeline.
- Access the EC2 Image Builder service.
- In the left navigation pane, select Infrastructure configuration, then click
Create infrastructure configuration. - In the General section, enter:
- Name:
pattern3-pipeline-InfraConfig. - Description:
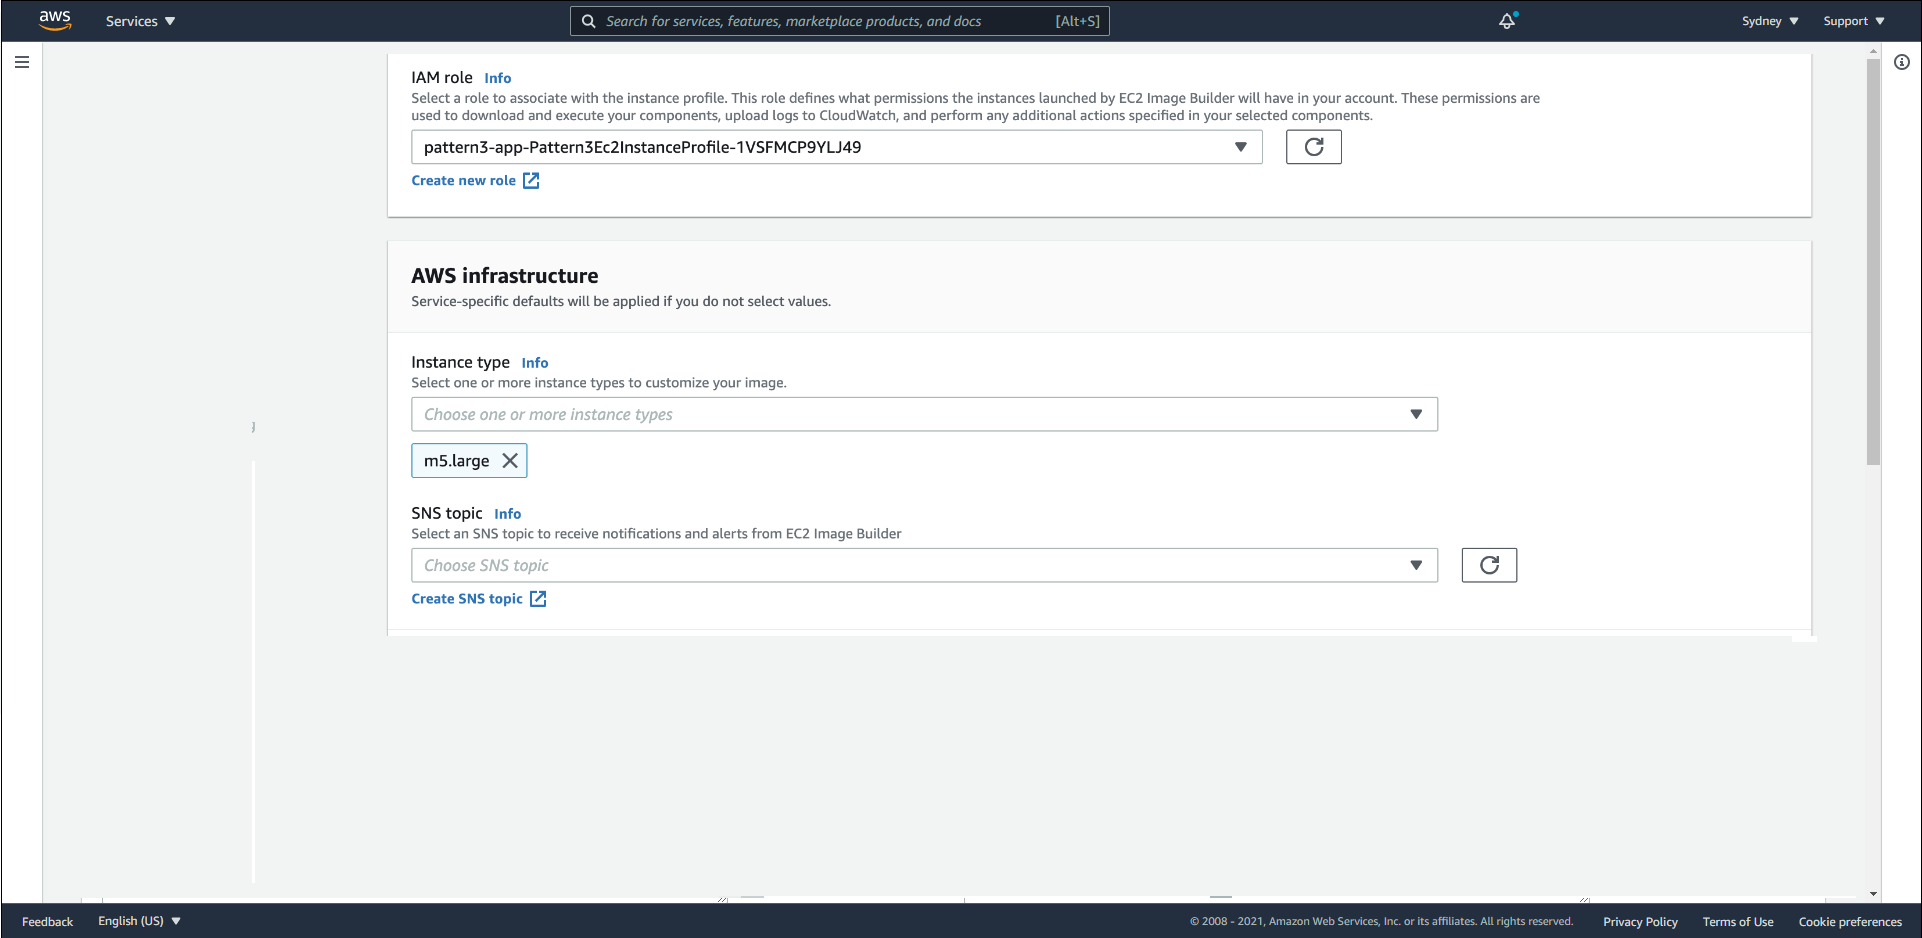
Build infrastructure for pattern3 image pipeline. - IAM role: select
pattern3-recipe-instance-rolecreated earlier.
- Name:
- In the AWS infrastructure section, enter:
- Instance type:
t3.medium. - SNS topic: leave blank.
- VPC, subnet, and security groups: select the VPC of the
pattern3-baseStack, choose a Private Subnet, and select thepattern3-pipeline-instance-security-groupsecurity group.
- Instance type:
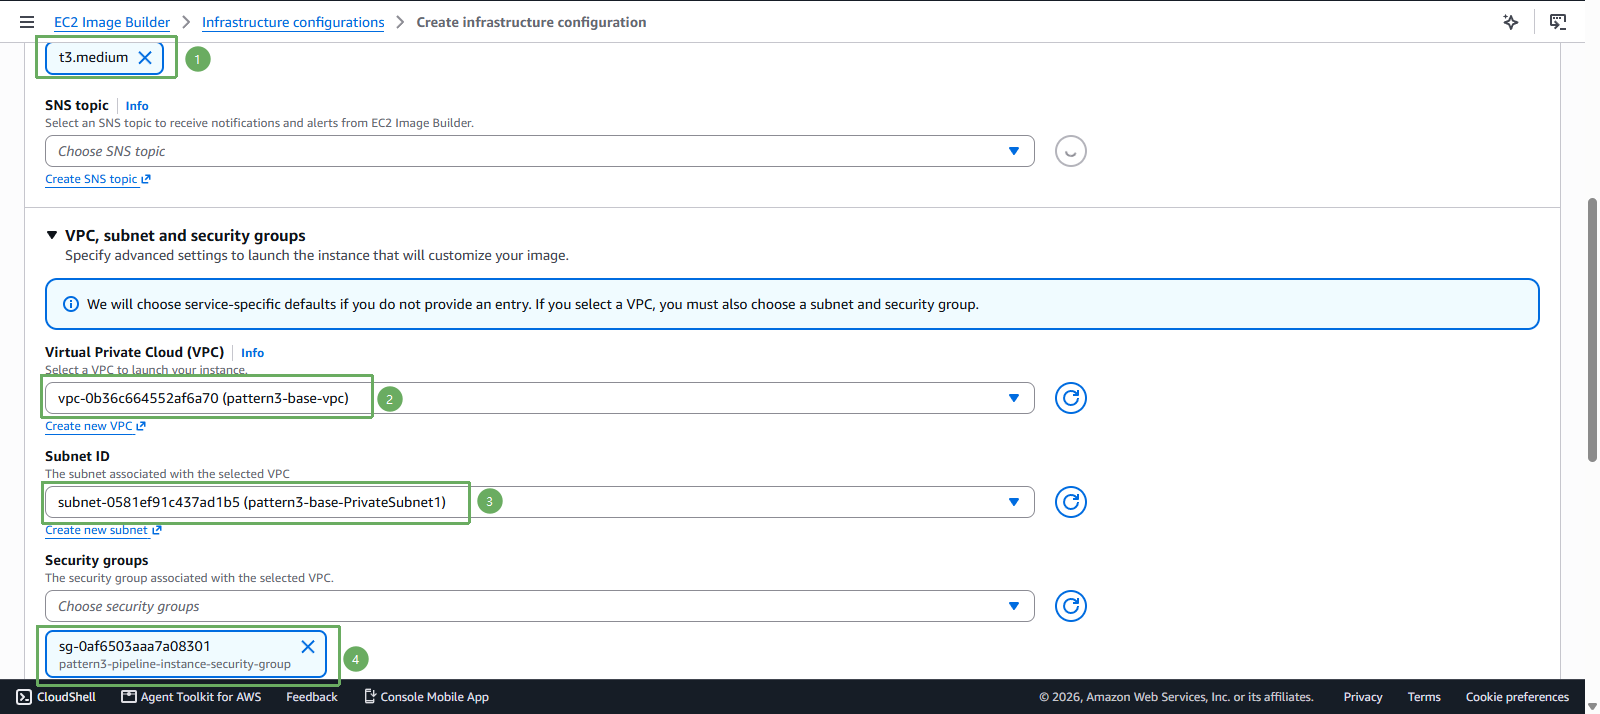
If you leave the VPC and subnet blank, Image Builder will use the account’s default VPC and default subnet. The lab will still build the AMI, but the build instance will not reside in the infrastructure you created in section 2, and the architecture will no longer match the diagram. Please select them explicitly.
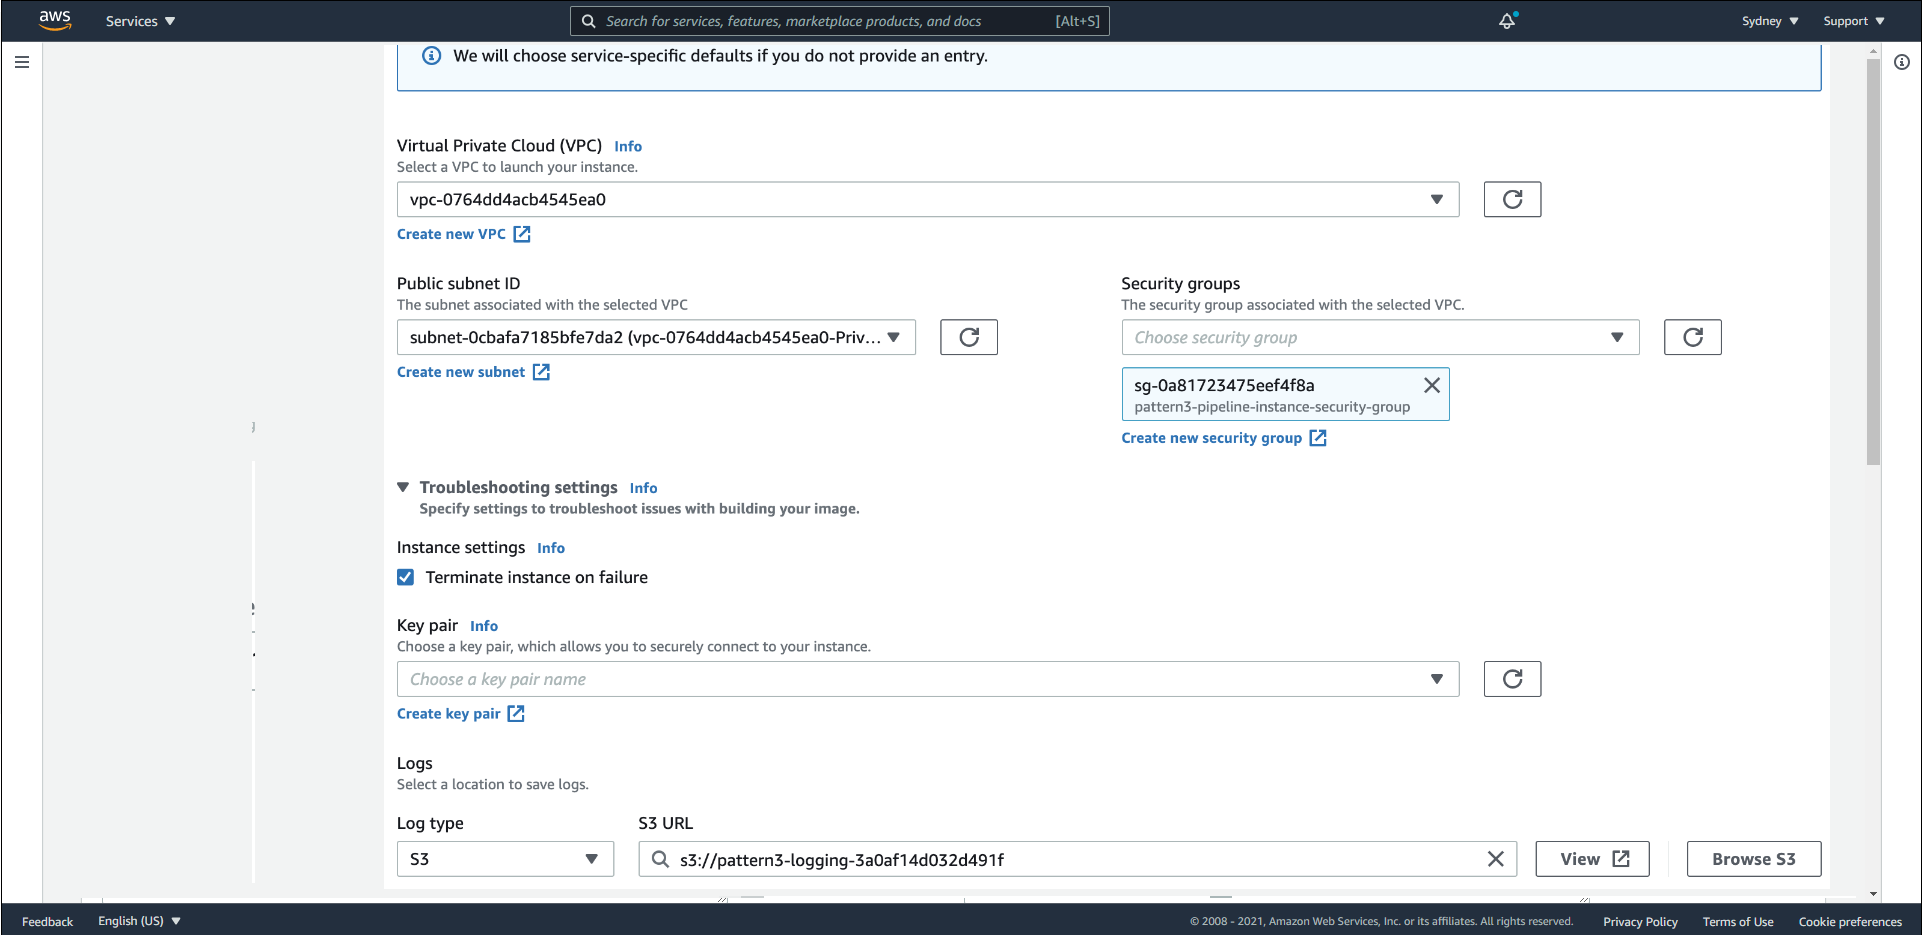
- In the Troubleshooting settings section:
- Keep
Terminate instance on failureenabled. - Key pair: leave blank, we do not use SSH.
- S3 location for logs: select the S3 bucket created in the previous step.
- Keep
- Click
Create infrastructure configuration.
The build instance must reside in a Private Subnet with outbound Internet access via NAT Gateway. This instance needs to connect to Systems Manager and the Amazon Linux 2023 repository to download patches. If placed in an isolated subnet, the pipeline will hang at the Building step and then fail because the SSM Agent cannot register.
Retrieve the VPC ID and Subnet ID from the Outputs of the pattern3-base Stack:
aws cloudformation describe-stacks --stack-name pattern3-base --region ap-southeast-2 --query "Stacks[0].Outputs" --output table
Create a Builder Pipeline
In the left navigation pane, select Image pipelines, then click
Create pipeline.General section:
- Pipeline name:
pattern3-pipeline-ImagePipeline. - Description:
Pattern 3 pipeline to update OS.
- Pipeline name:
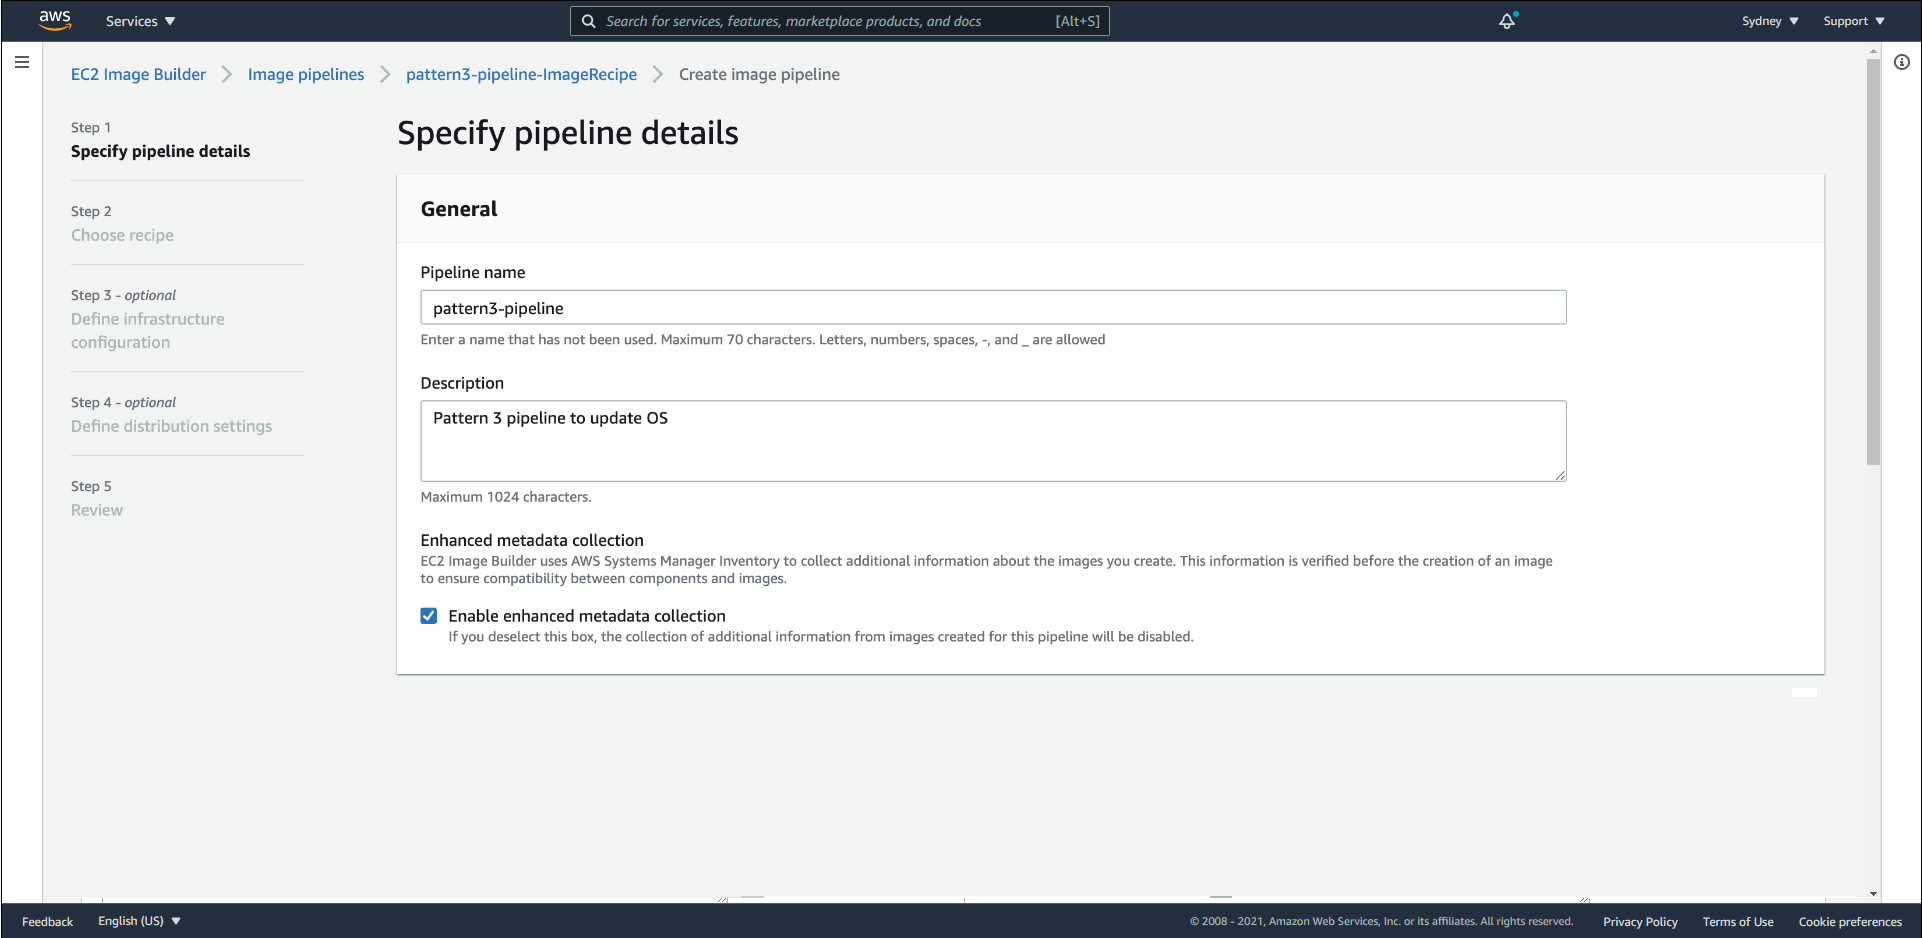
- Build schedule section, Schedule type: select
Manual.
The page defaults to On schedule, running automatically every week. You must change it to Manual, for two reasons: in section 5 we will trigger the pipeline via Systems Manager, and a periodically running pipeline will silently create a new AMI and EBS Snapshot every week, incurring charges even after you finish learning.
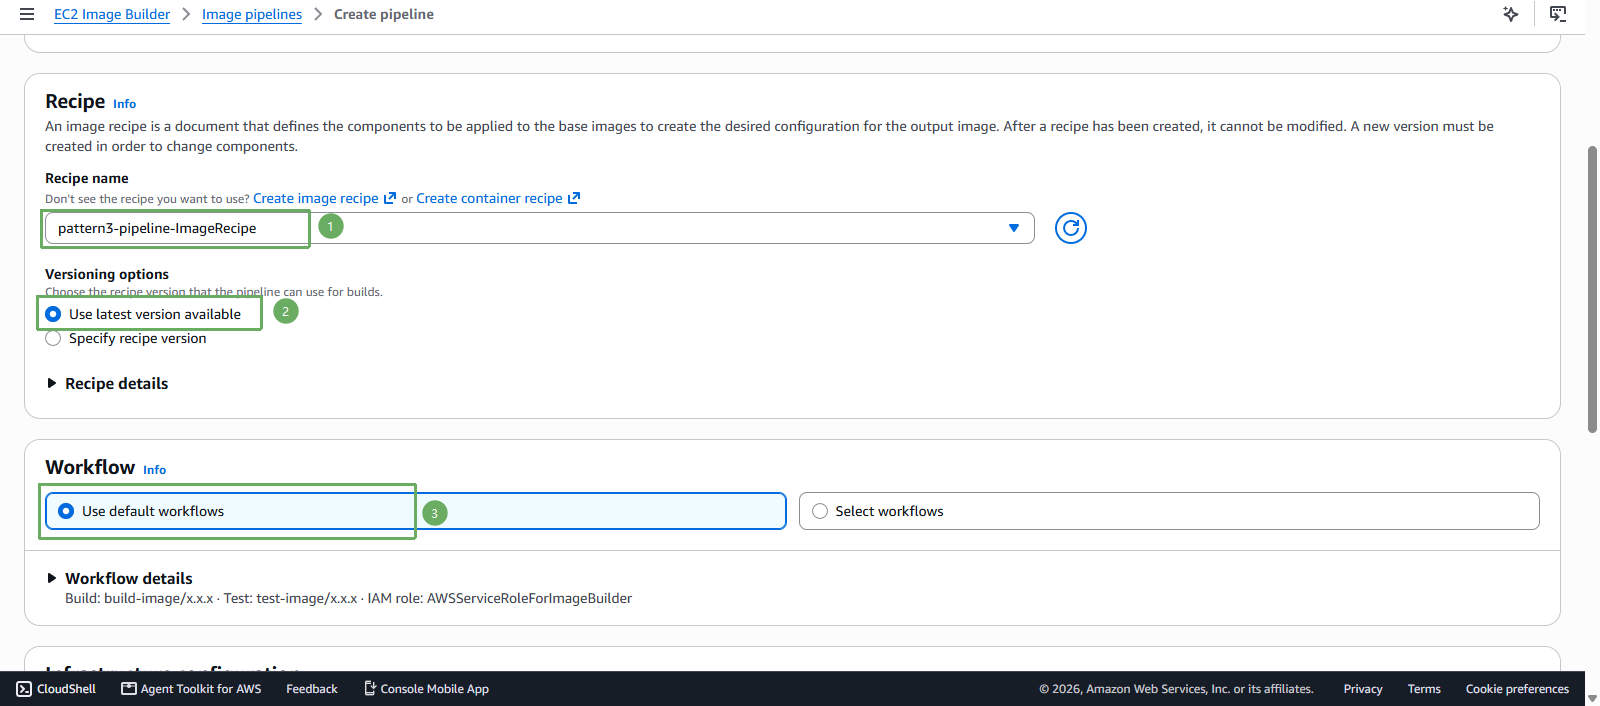
Recipe section:
- Recipe name: select
pattern3-pipeline-ImageRecipefrom the list. - Versioning options: select
Use latest version availableso the pipeline automatically uses the latest recipe version. If you want to fix it, chooseSpecify recipe versionthen1.0.0.
- Recipe name: select
Workflow section: keep
Use default workflows.
- Infrastructure configuration section: select
Select a configuration, then choosepattern3-pipeline-InfraConfigcreated in the previous step.
Distribution settings section: keep
Create with default settings. The AMI will be created in the current Regionap-southeast-2, just as the Distribution details line shows.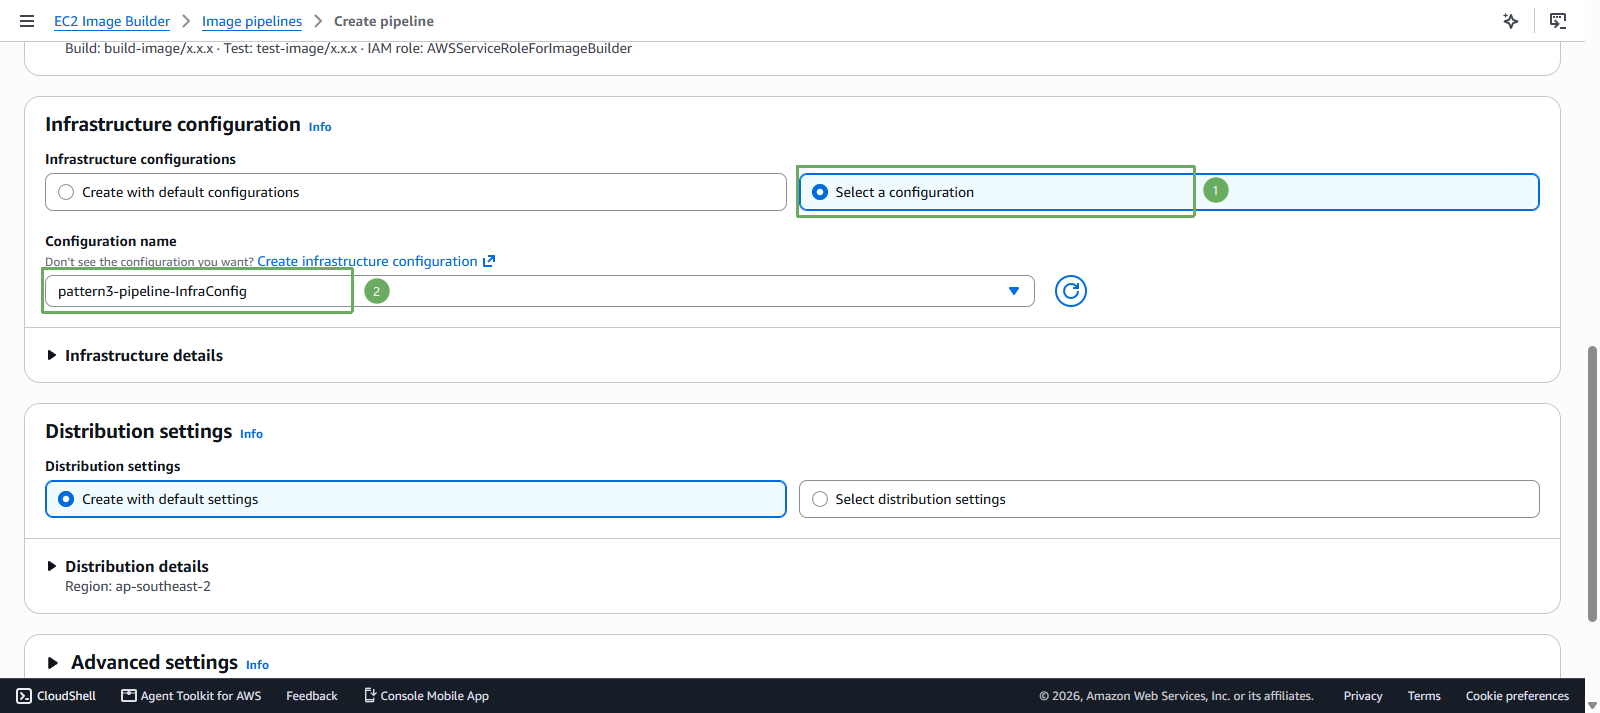
Advanced settings section, expand if you wish to tweak. For the lab you can keep everything as default:
- Image tags and Tags: optional. If you want to easily find resources later, add the tag
ResourceType=awsstudygroup-000099-imagebuilder. - Auto-disable policy: keep the default
5 consecutive failures. This policy only applies to scheduled runs, not manualRun pipeline. - Image log group and Pipeline log group: leave blank for Image Builder to use default CloudWatch log groups.
- Enhanced metadata (AMI only): defaults to
Disabled, keeping it as is works fine. ChooseEnabledif you want Image Builder to collect metadata via SSM Inventory to check component compatibility. - EC2 image scanning: is grayed out and locked at
Disabled. To enable vulnerability scanning, you must activate security scanning settings at the account level first, which utilizes Amazon Inspector and is out of the scope of this lab. - ECR container scanning: ignore, we are not building container images.
- Image tags and Tags: optional. If you want to easily find resources later, add the tag
Click
Create pipelineat the bottom of the page.
With a t3.medium, the build process takes about 20 to 30 minutes. You can choose a smaller instance type to save costs, but the build time will be longer. Most of the time is spent on standard Image Builder steps like initializing the instance, running the component, taking a snapshot, and registering the AMI.
Execute Builder Pipeline
Once the specification process is complete, we proceed to test the Builder Pipeline.
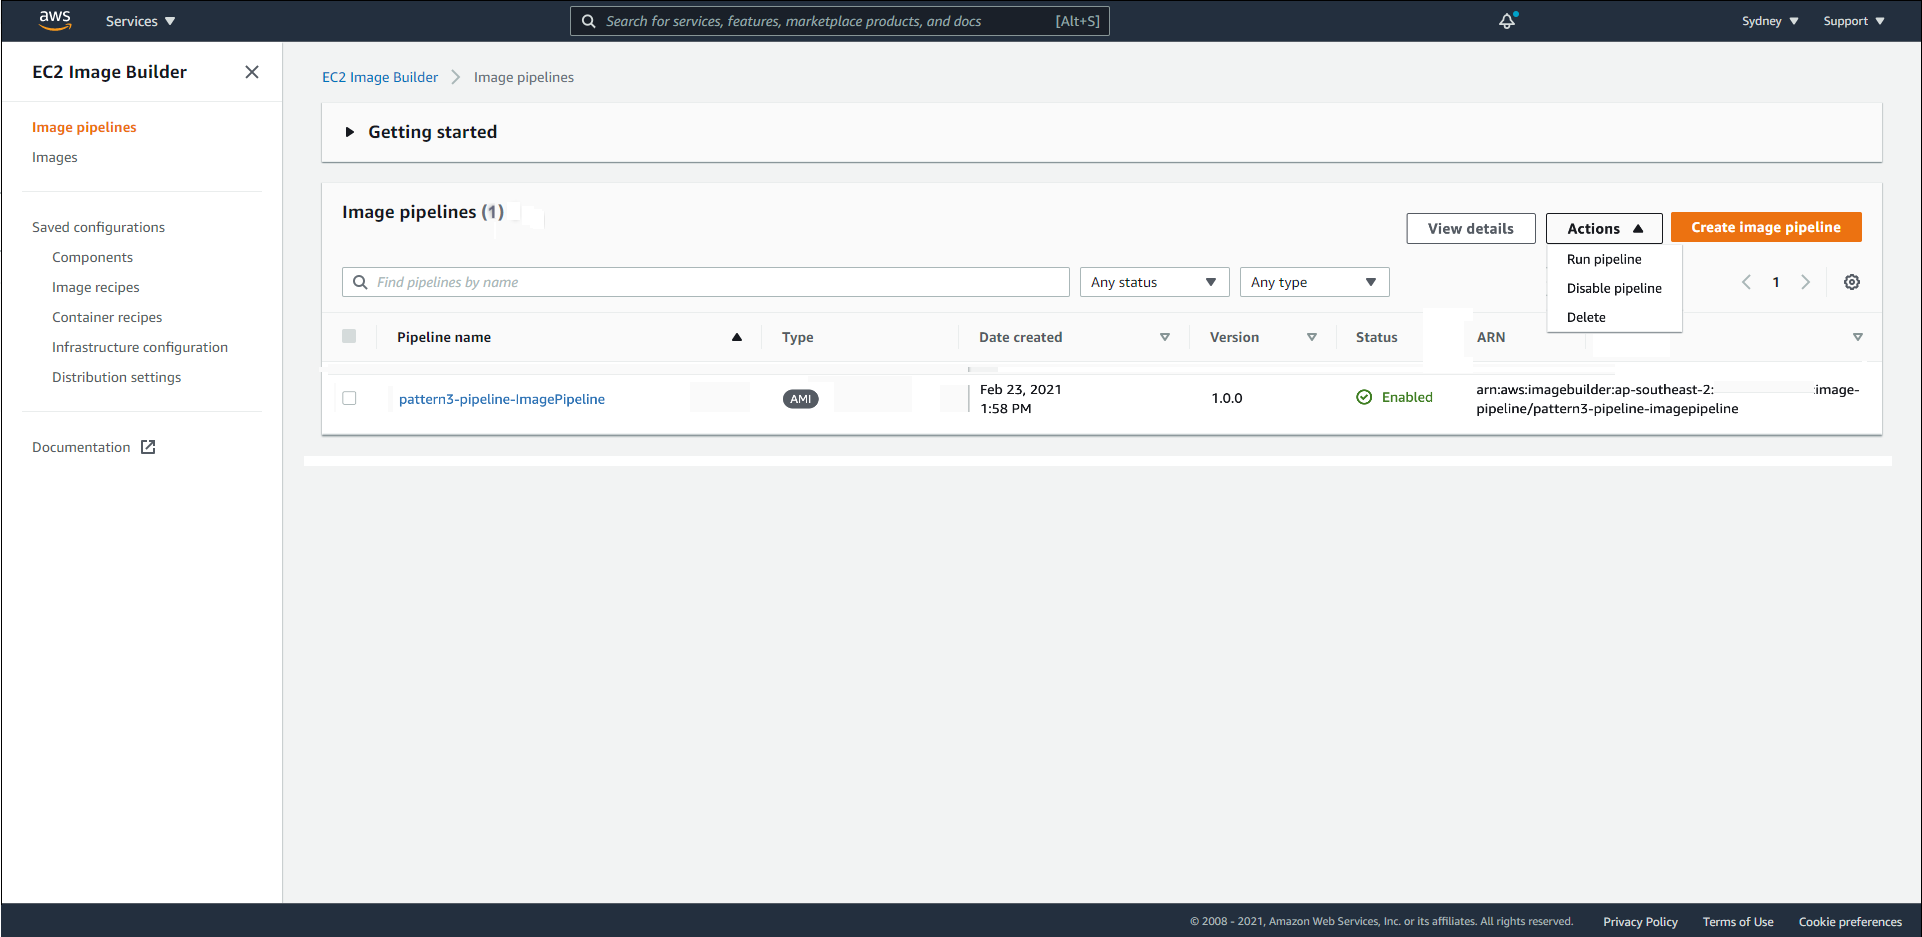
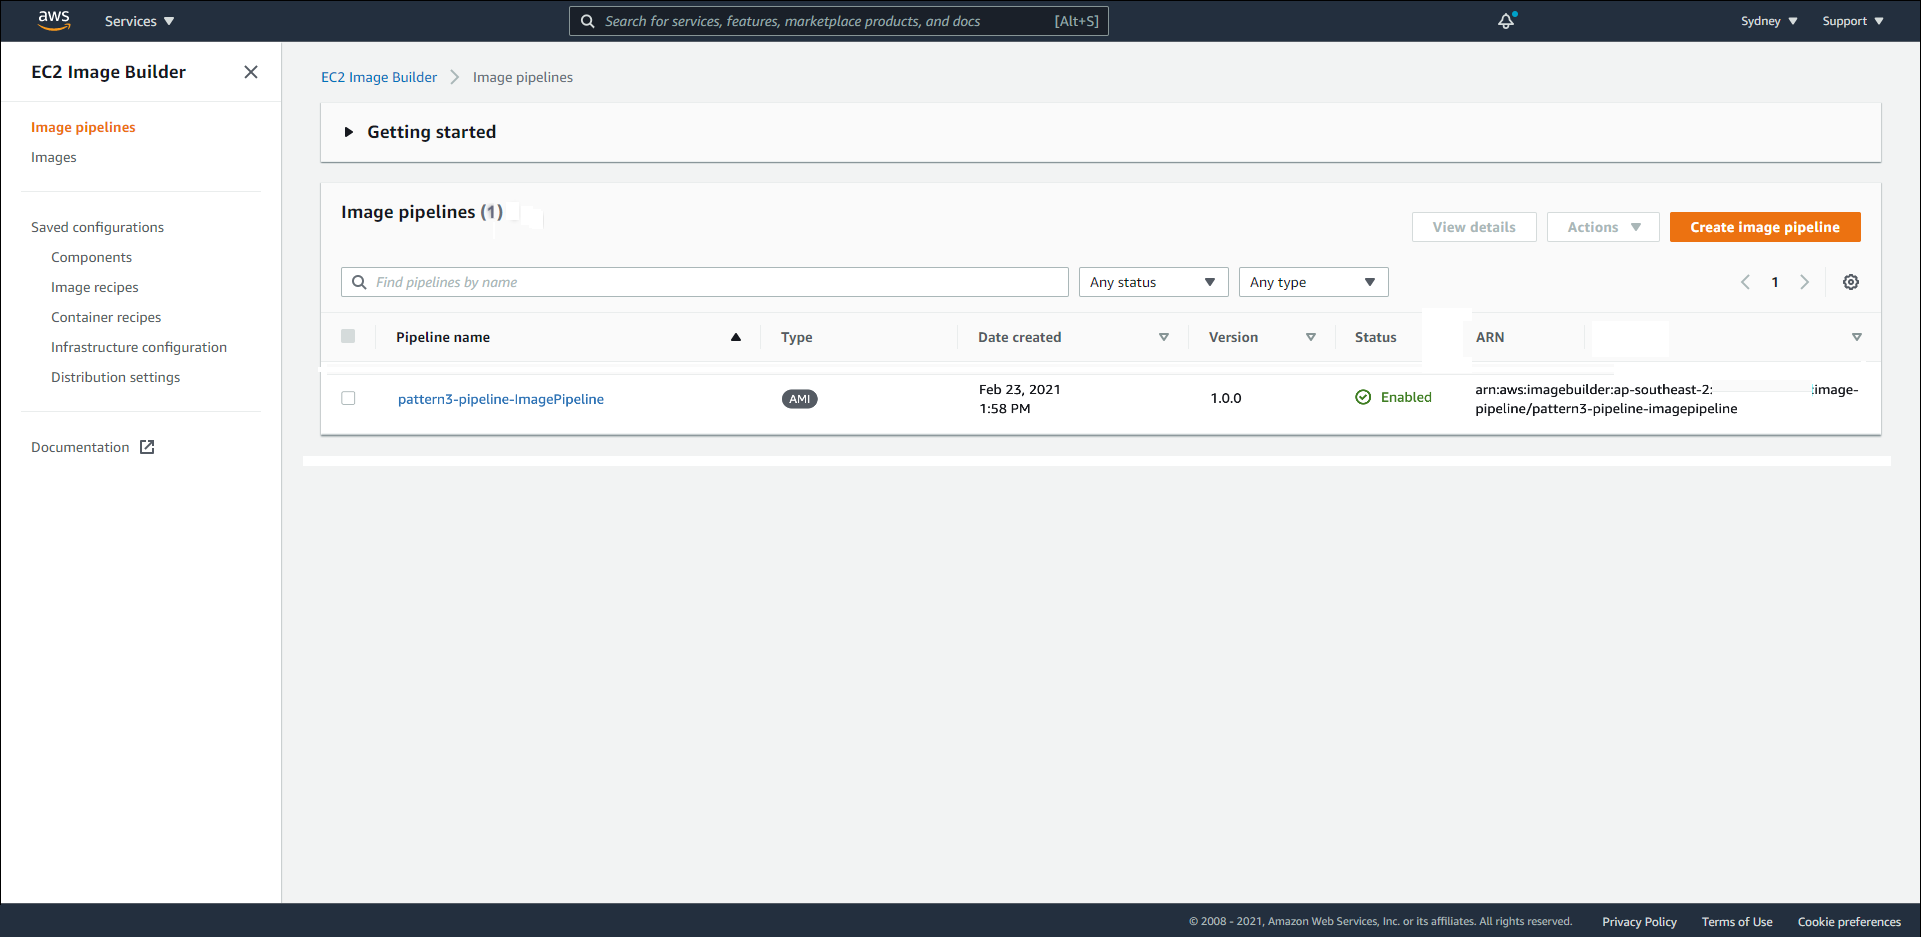
In the Image pipelines list, select the pipeline just created, click the
Actionsbutton and selectRun pipeline.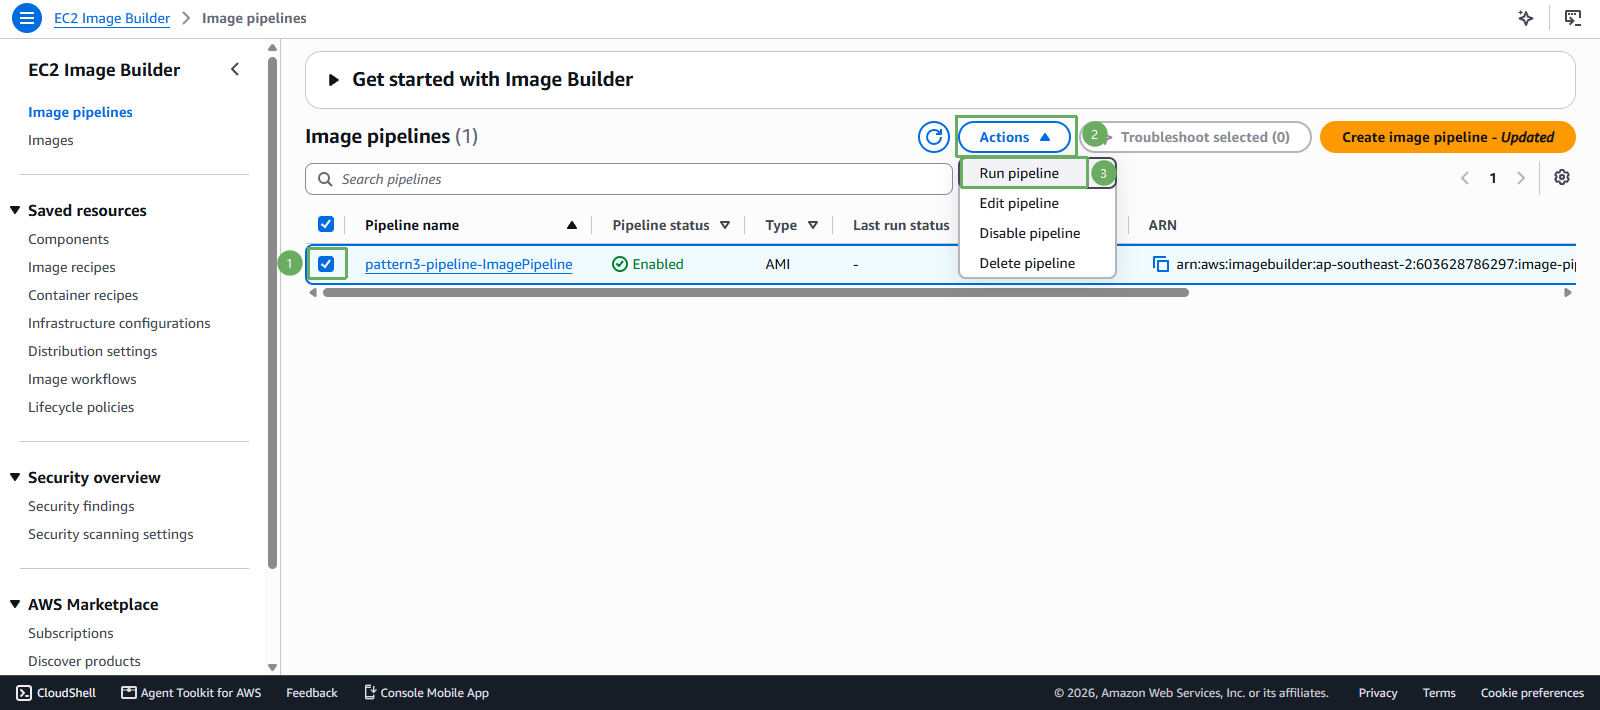
Once execution is complete, we will check whether the new AMI has been initialized or not.
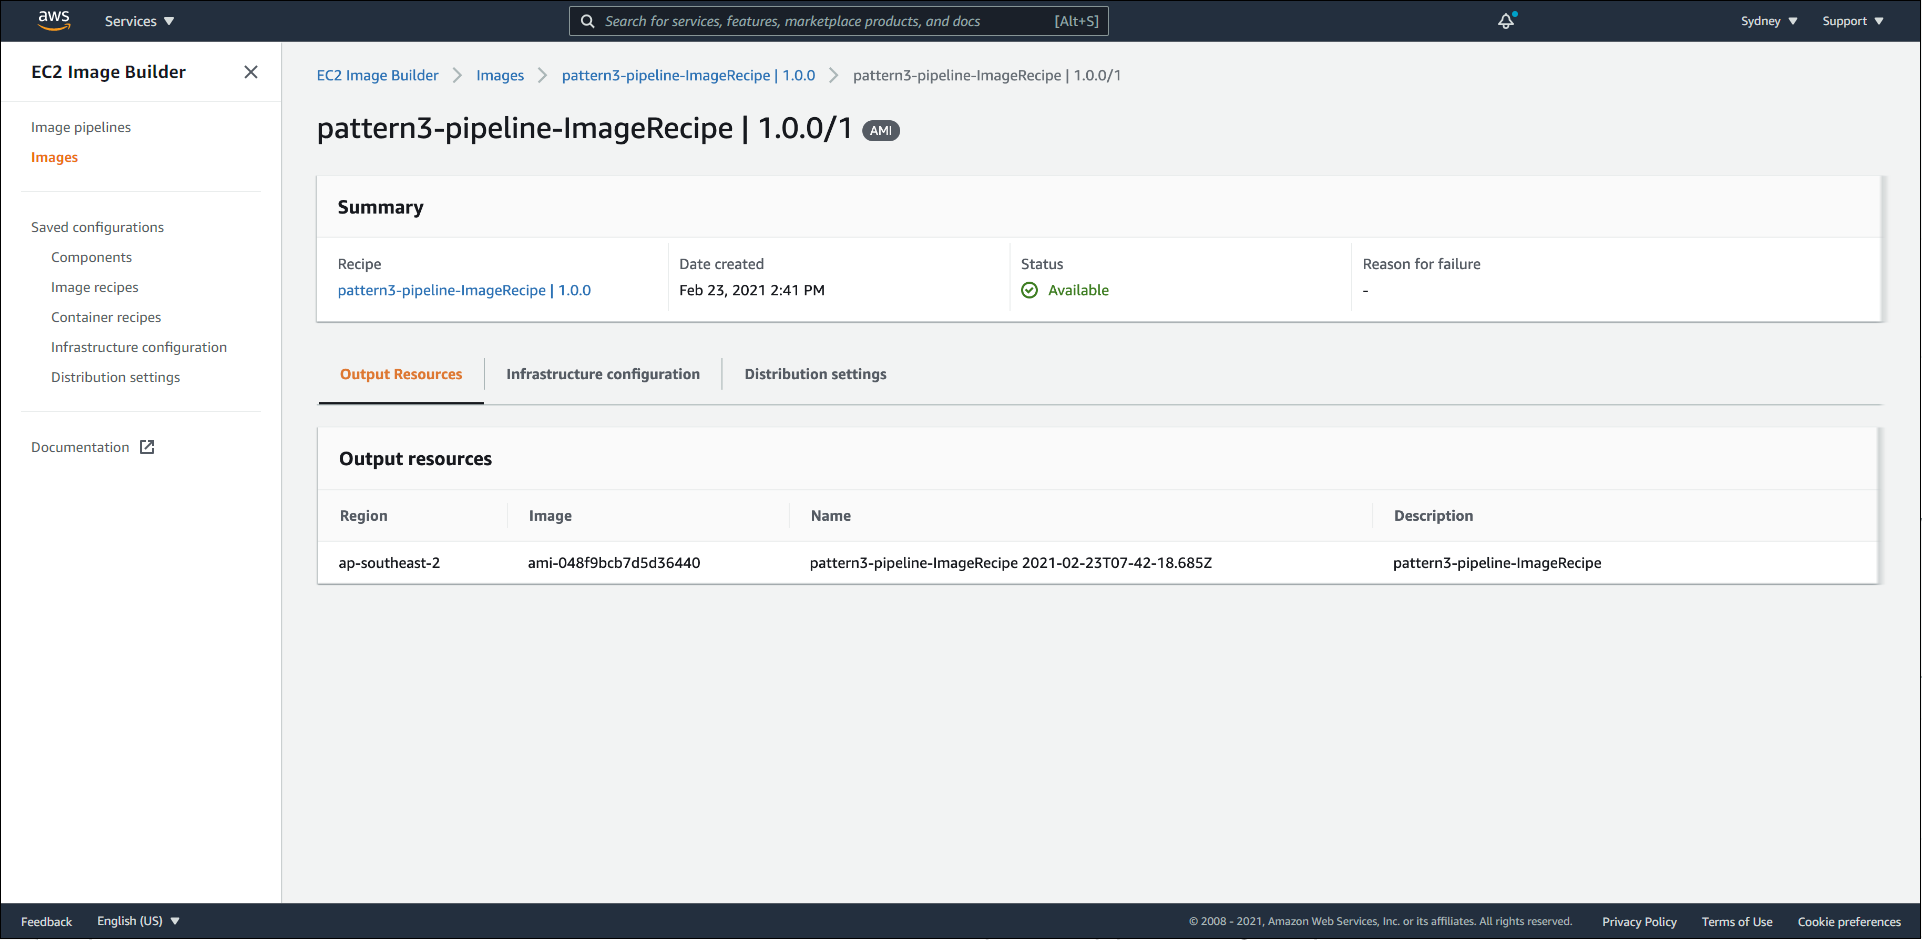
If using the AWS CLI, you can run the pipeline and monitor its status as follows:
# Get the pipeline ARN directly from Image Builder, works for both creation methods
PIPELINE_ARN=$(aws imagebuilder list-image-pipelines --region ap-southeast-2 --query "imagePipelineList[?name=='pattern3-pipeline-ImagePipeline'].arn | [0]" --output text)

BUILD_ARN=$(aws imagebuilder start-image-pipeline-execution --image-pipeline-arn "$PIPELINE_ARN" --region ap-southeast-2 --query "imageBuildVersionArn" --output text)

aws imagebuilder get-image --image-build-version-arn "$BUILD_ARN" --region ap-southeast-2 --query "image.state" --output json
The status will progress through PENDING, BUILDING, TESTING, DISTRIBUTING, and then AVAILABLE. Once it reaches AVAILABLE, you retrieve the new AMI ID using:
aws imagebuilder get-image --image-build-version-arn "$BUILD_ARN" --region ap-southeast-2 --query "image.outputResources.amis[0].image" --output text
# Get the pipeline ARN directly from Image Builder, works for both creation methods
$PIPELINE_ARN = aws imagebuilder list-image-pipelines --region ap-southeast-2 --query "imagePipelineList[?name=='pattern3-pipeline-ImagePipeline'].arn | [0]" --output text

$BUILD_ARN = aws imagebuilder start-image-pipeline-execution --image-pipeline-arn "$PIPELINE_ARN" --region ap-southeast-2 --query "imageBuildVersionArn" --output text

aws imagebuilder get-image --image-build-version-arn "$BUILD_ARN" --region ap-southeast-2 --query "image.state" --output json
The status will progress through PENDING, BUILDING, TESTING, DISTRIBUTING, and then AVAILABLE. Once it reaches AVAILABLE, you retrieve the new AMI ID using:
aws imagebuilder get-image --image-build-version-arn "$BUILD_ARN" --region ap-southeast-2 --query "image.outputResources.amis[0].image" --output text
EC2 Image Builder uses an Automation Document from the Systems Manager service to complete the initialization process. We can access Systems Manager to track this process as well as check the status of the ImageBuilderBuildImageDocument document.
Refer to more details about monitoring an Automation Document at Running automations.
Each successful pipeline run will generate an AMI along with an EBS Snapshot. These resources are not deleted by CloudFormation when you delete the Stack, and the snapshot will continue to incur costs. The Resource Cleanup section provides instructions on how to delete them.
Now, we will transition to the next section detailing the Build Automation deployment with the Systems Manager service.